Welcome
About This Guide
ForXell is a comprehensive ERP system: customers, suppliers, products, inventory, quotes, orders, delivery notes, electronic invoices (Factur-X), purchasing, after-sales service, calendar, accounting… all in a single web application.
This guide walks you through getting started, in the recommended order. We illustrate each step using a fictional demo company—“Studio Création Visuelle”—and its partners, so you can follow along exactly with your own data.
How to use it: Follow the chapters in order the first time. Each tile on the dashboard and each entry in the left-hand menu opens a work window—you can open several and switch between them.
Step 1
Create Your Account & Start the Trial
It all starts at forxell.com.
- Go to forxell.com and click on Pricing / Try It.
- Choose your plan (monthly or annual), the number of positions, and, if you have one, enter your promo code.
- Confirm your 14-day trial. Payment is securely processed by Stripe; you won’t be charged until the end of the trial.
- You’ll immediately receive an activation email containing the address for your account (e.g.,
https://votre-societe.forxell.com) and your temporary login credentials.
Your dedicated address. Each customer has their own subdomain <votre-societe>.forxell.com and an isolated database. You can later point your domain name to it.
Step 2
First Login & Security
- Open the link you received via email, e.g., https://votre-societe.forxell.com/app/login.
- Enter your email address and the temporary password, then set your personal password.
- Enable two-factor authentication (2FA)—required to protect your data. You can use a one-time code or, on mobile, your fingerprint or Face ID (passkey).
Security. Never share your password or 2FA codes. An automatic screen lock after inactivity is available in Company (Settings) › Security—you can enable or disable it and adjust the time interval.
Step 3
Explore the Dashboard
Once logged in, you’ll be taken to your dashboard. This is your starting point for all features.
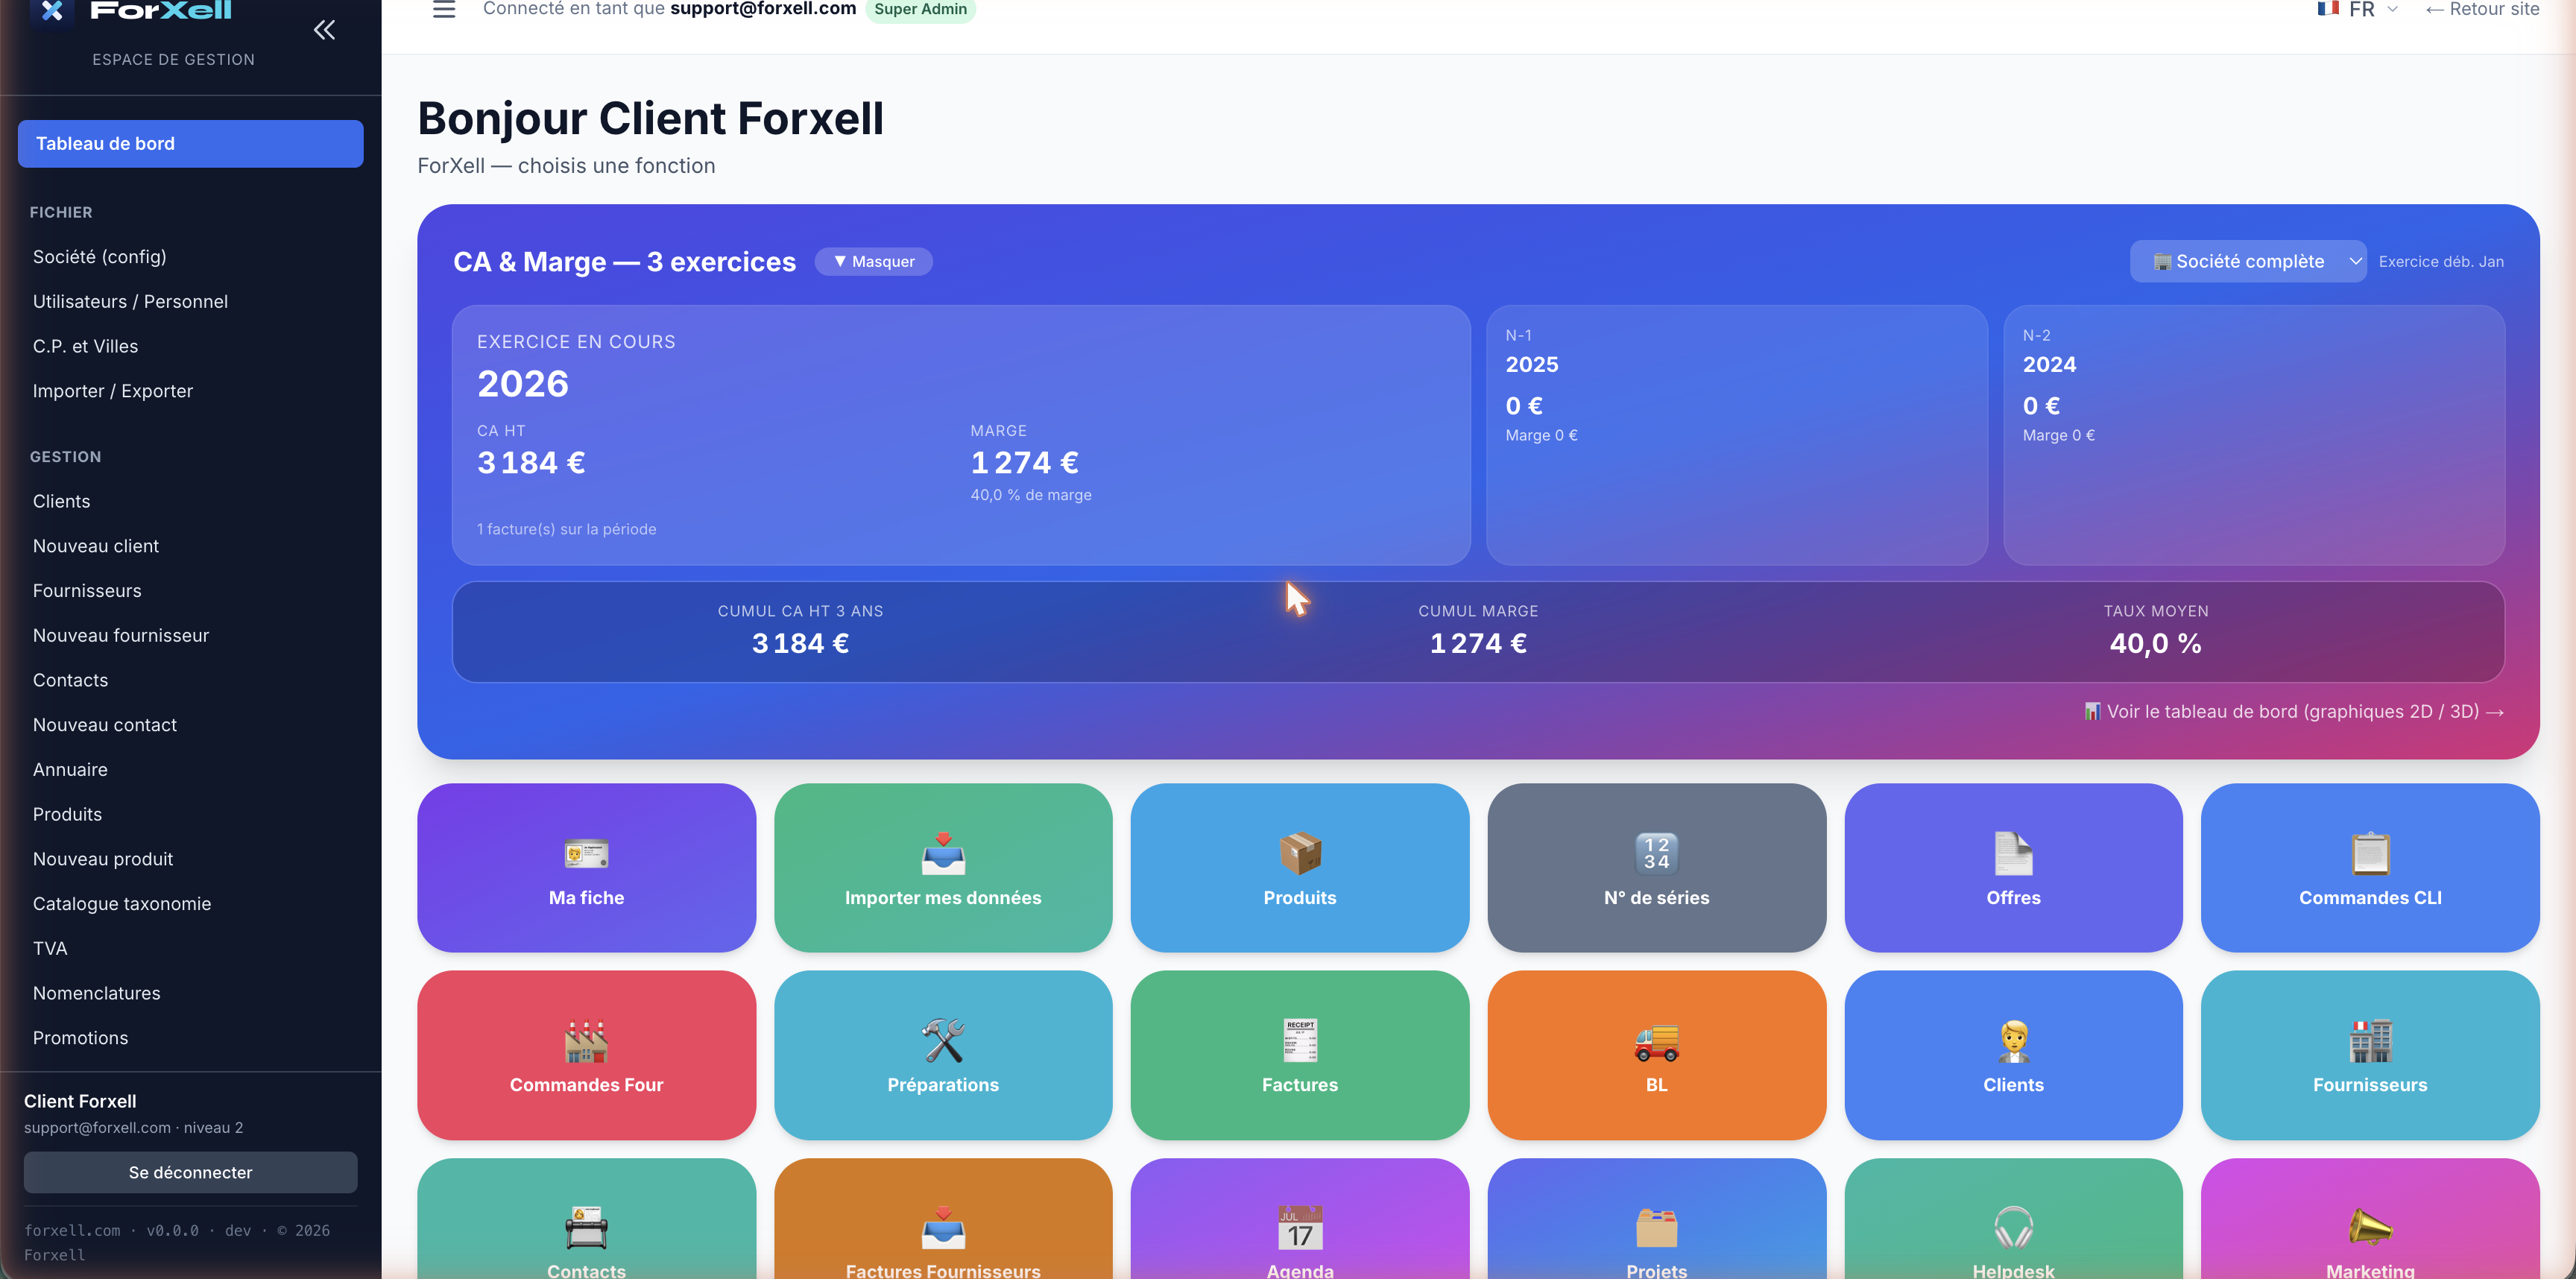
The three key areas to know
- The left-hand menu—organized into FILE (Company, Users, Postal Codes & Cities, Import/Export) and MANAGEMENT (Customers, Suppliers, Products, Contacts…).
- The metrics at the top—Revenue, Margin, and Average Rate over 3 fiscal years, updated in real time.
- The tiles—direct access to modules: Quotes, Orders, Invoices, Waybills, Inventory, Calendar, Helpdesk, AI Assistant, etc.
Step 4
Set Up Your Company
First, enter your company’s details: this information will appear on all your documents (quotes, orders, invoices) and on your public profile.
Open FILE › Company (Config). The configuration is organized into tabs.
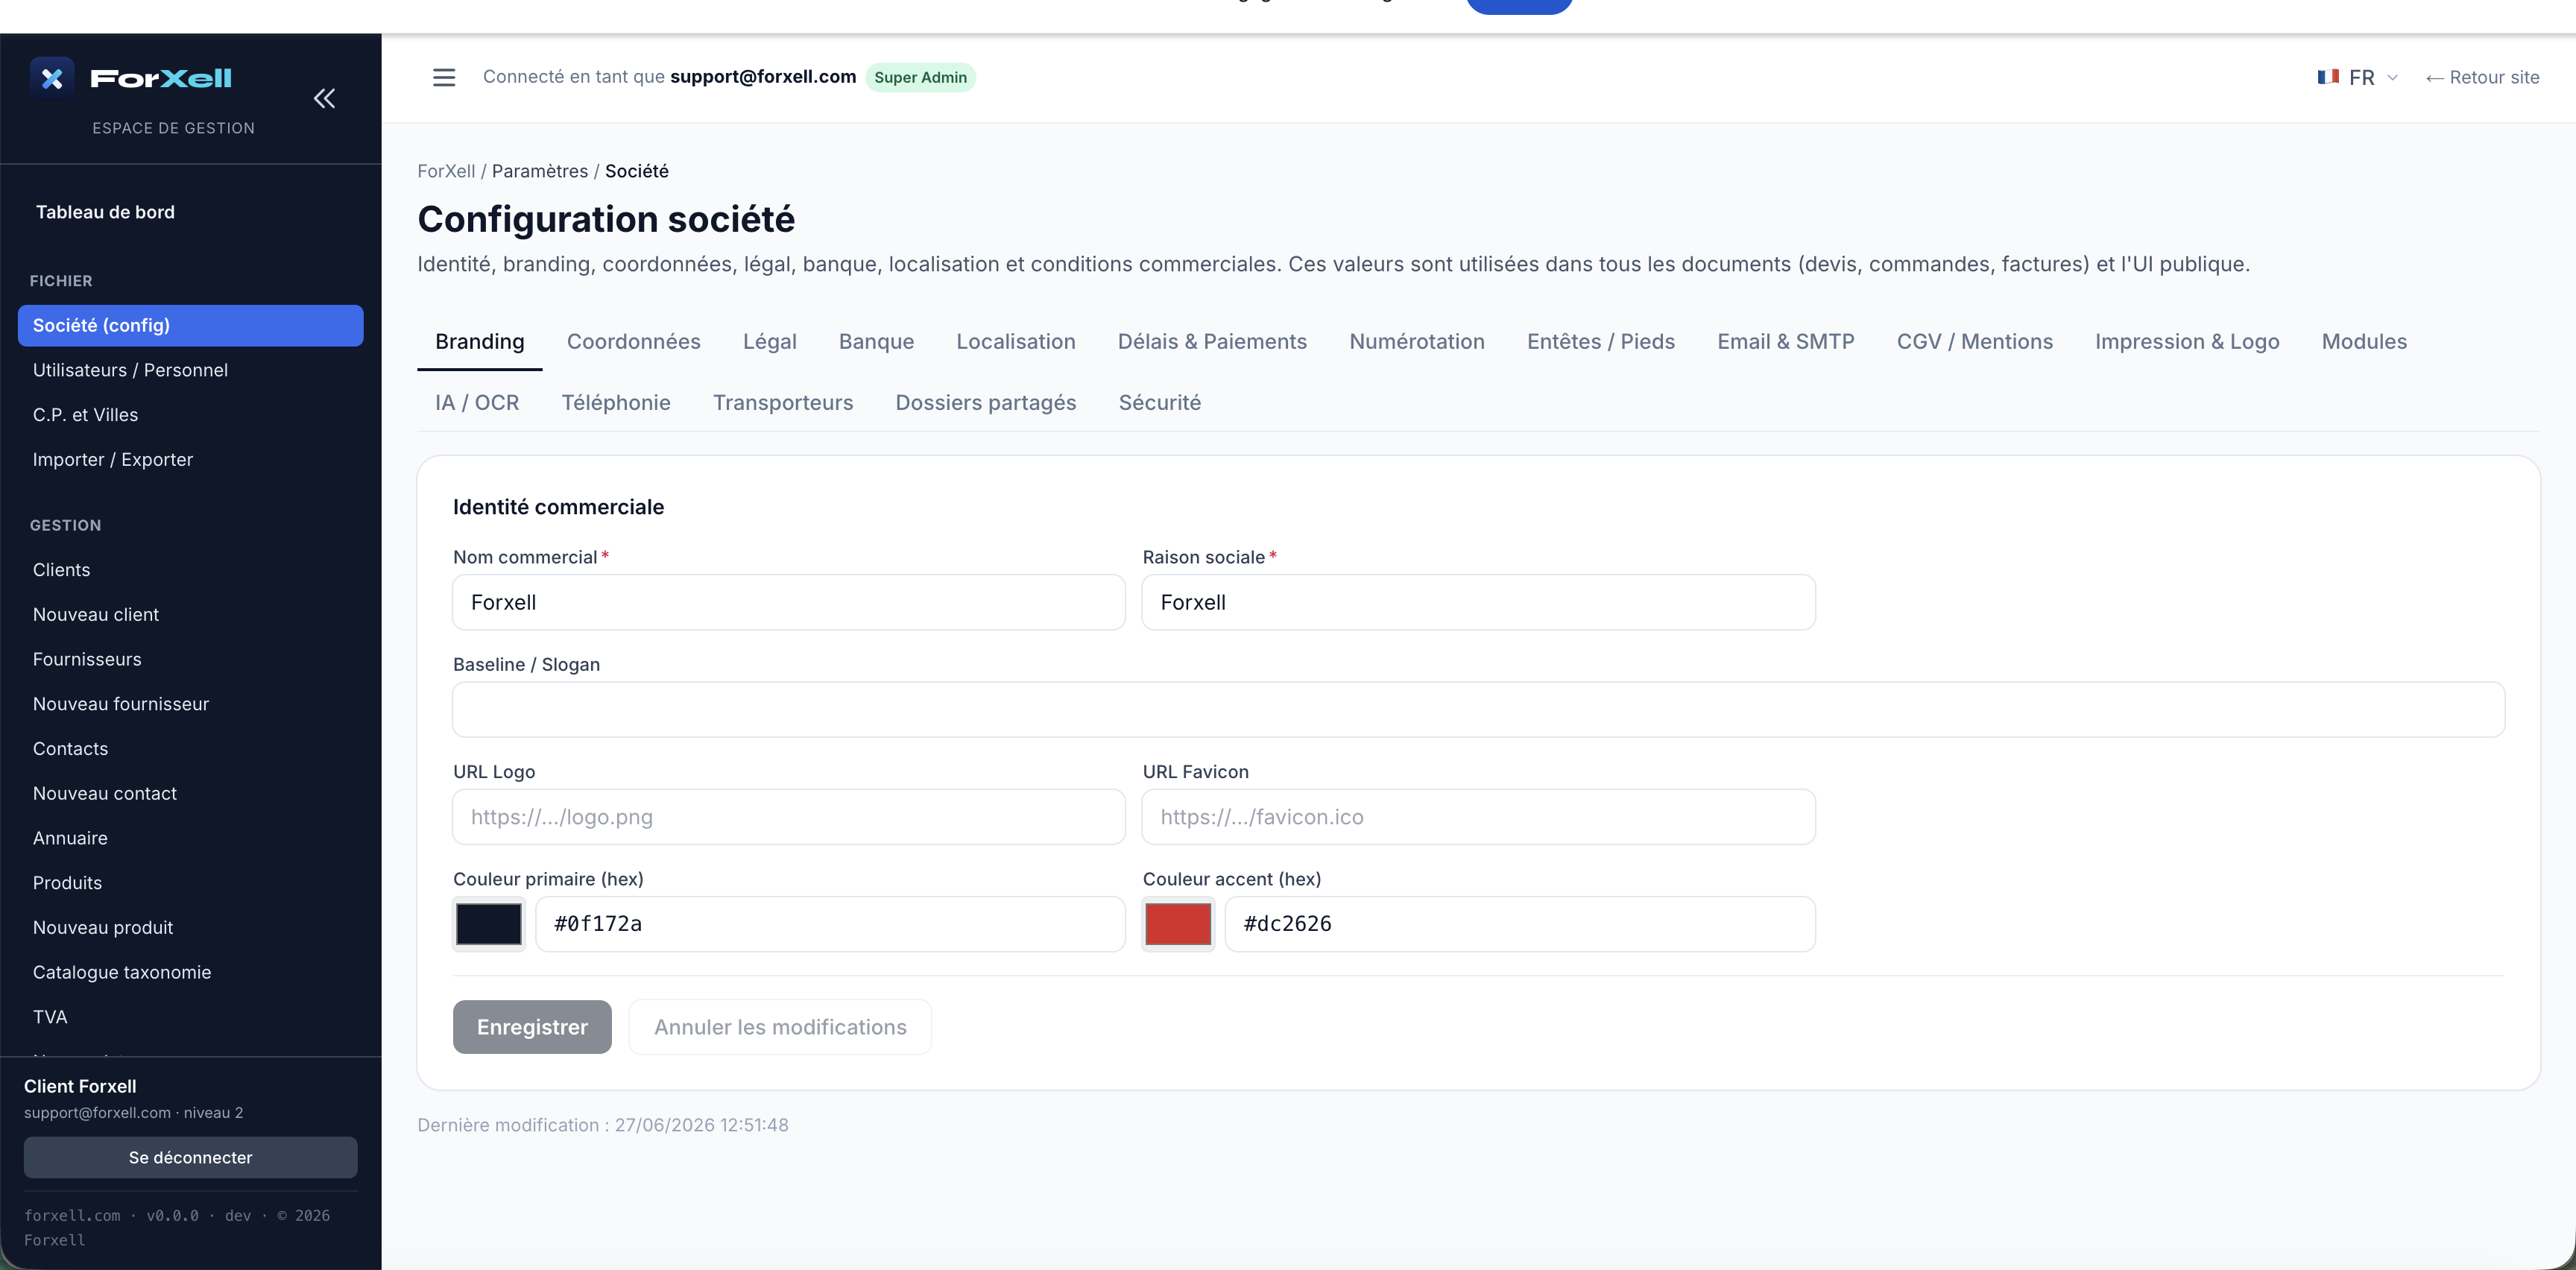
Contact Information tab
Headquarters address, phone number, and contact emails.
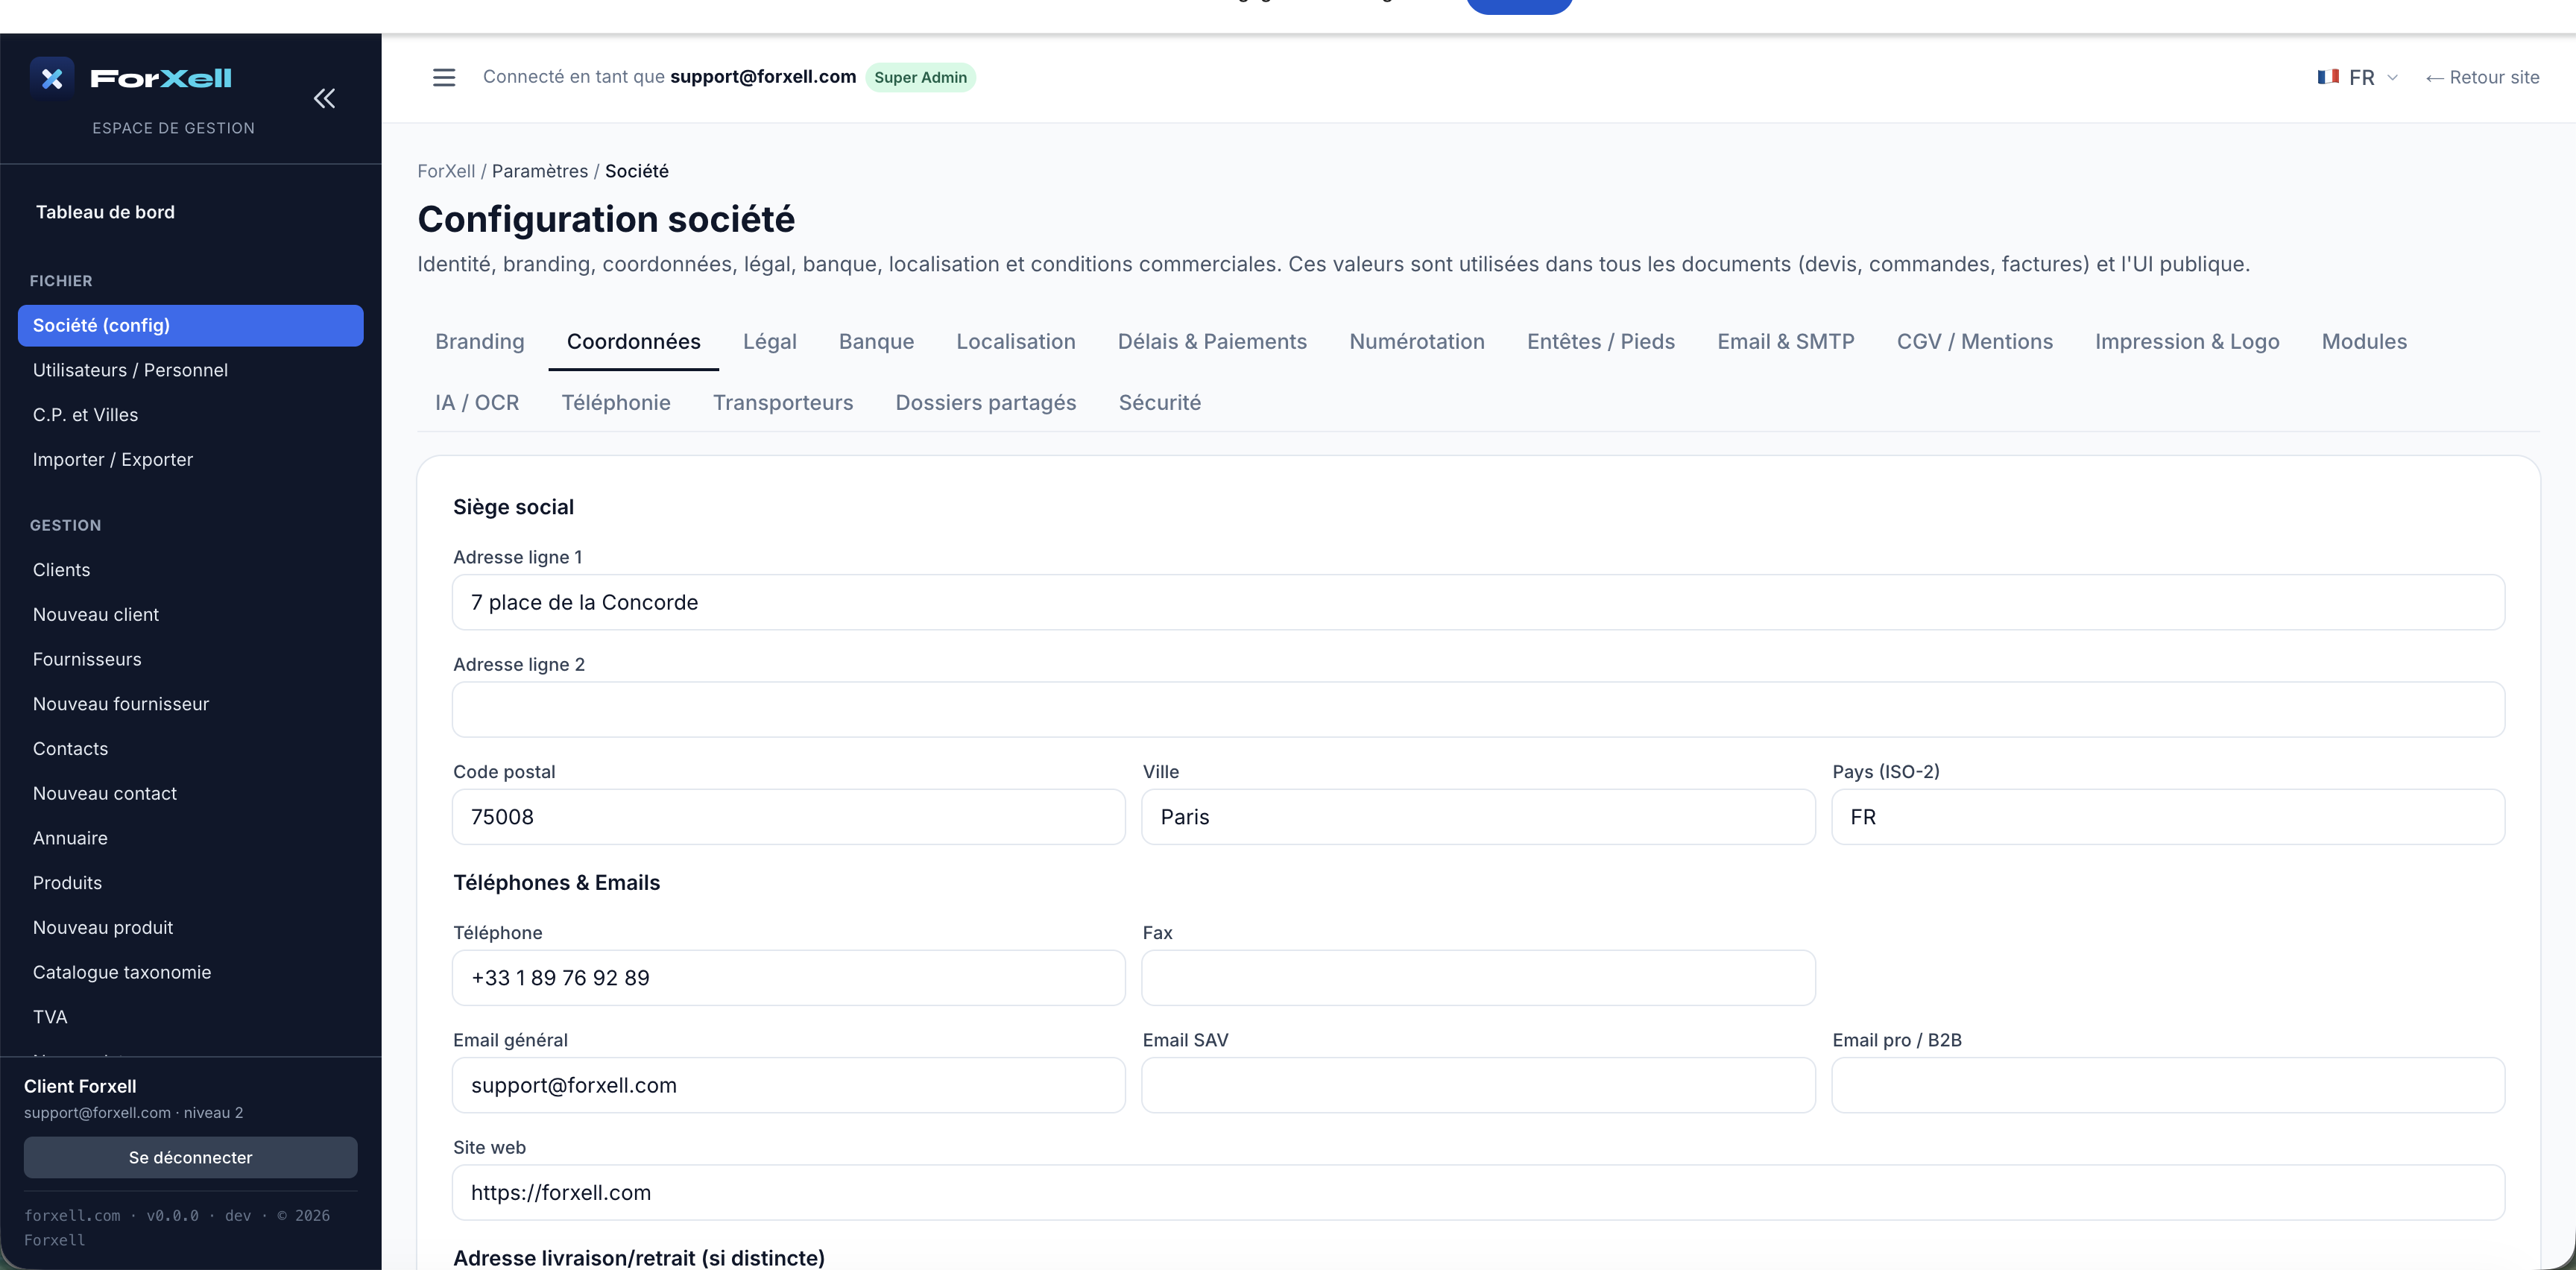
Legal Tab
French legal identification: SIRET, SIREN, intra-EU VAT number, APE/NAF code, RCS, and share capital. These details are required on your invoices.
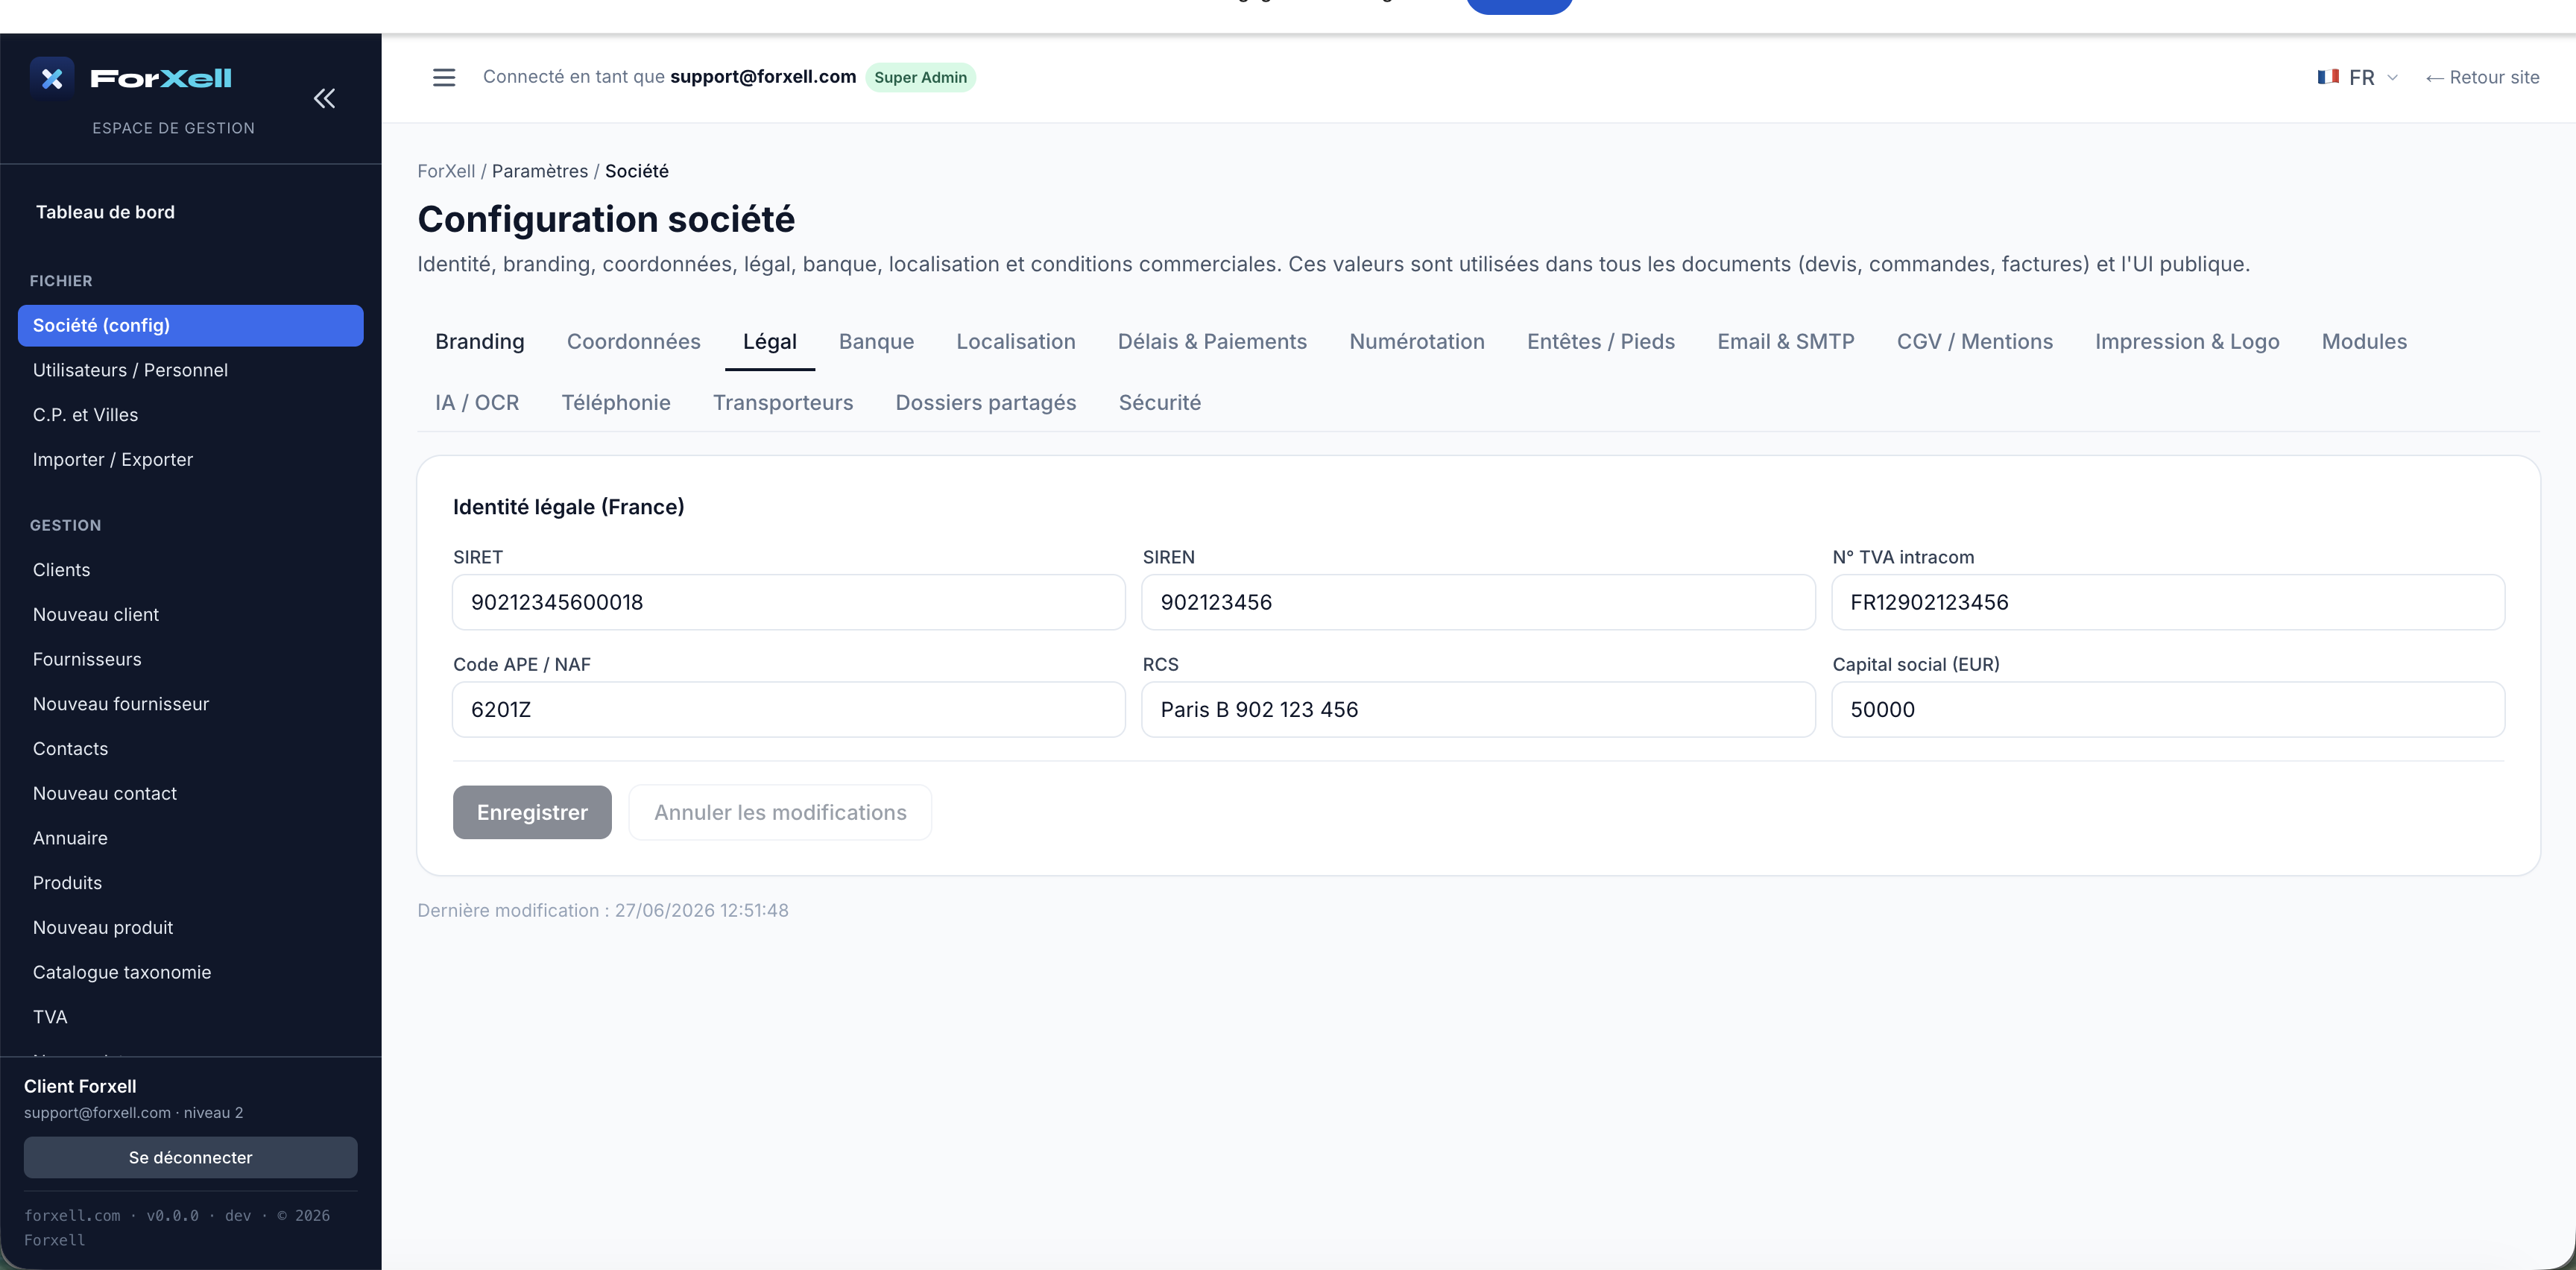
Branding tip: In the Branding tab, upload your logo, favicon, and colors—your documents and portal will reflect your visual identity.
Step 5 — Do this first
The Postal Codes & Cities Database
A key step that’s often overlooked. On a new account, this database is empty. However, creating a customer or supplier requires a recognized municipality: if you enter a ZIP code and city not found in the database, the entry will be rejected (“City not found”). Add your municipalities here first.
Open FILE › ZIP Codes & Cities, then click + New City and enter the ZIP code, city, and country. Repeat for all the cities you’ll be using.
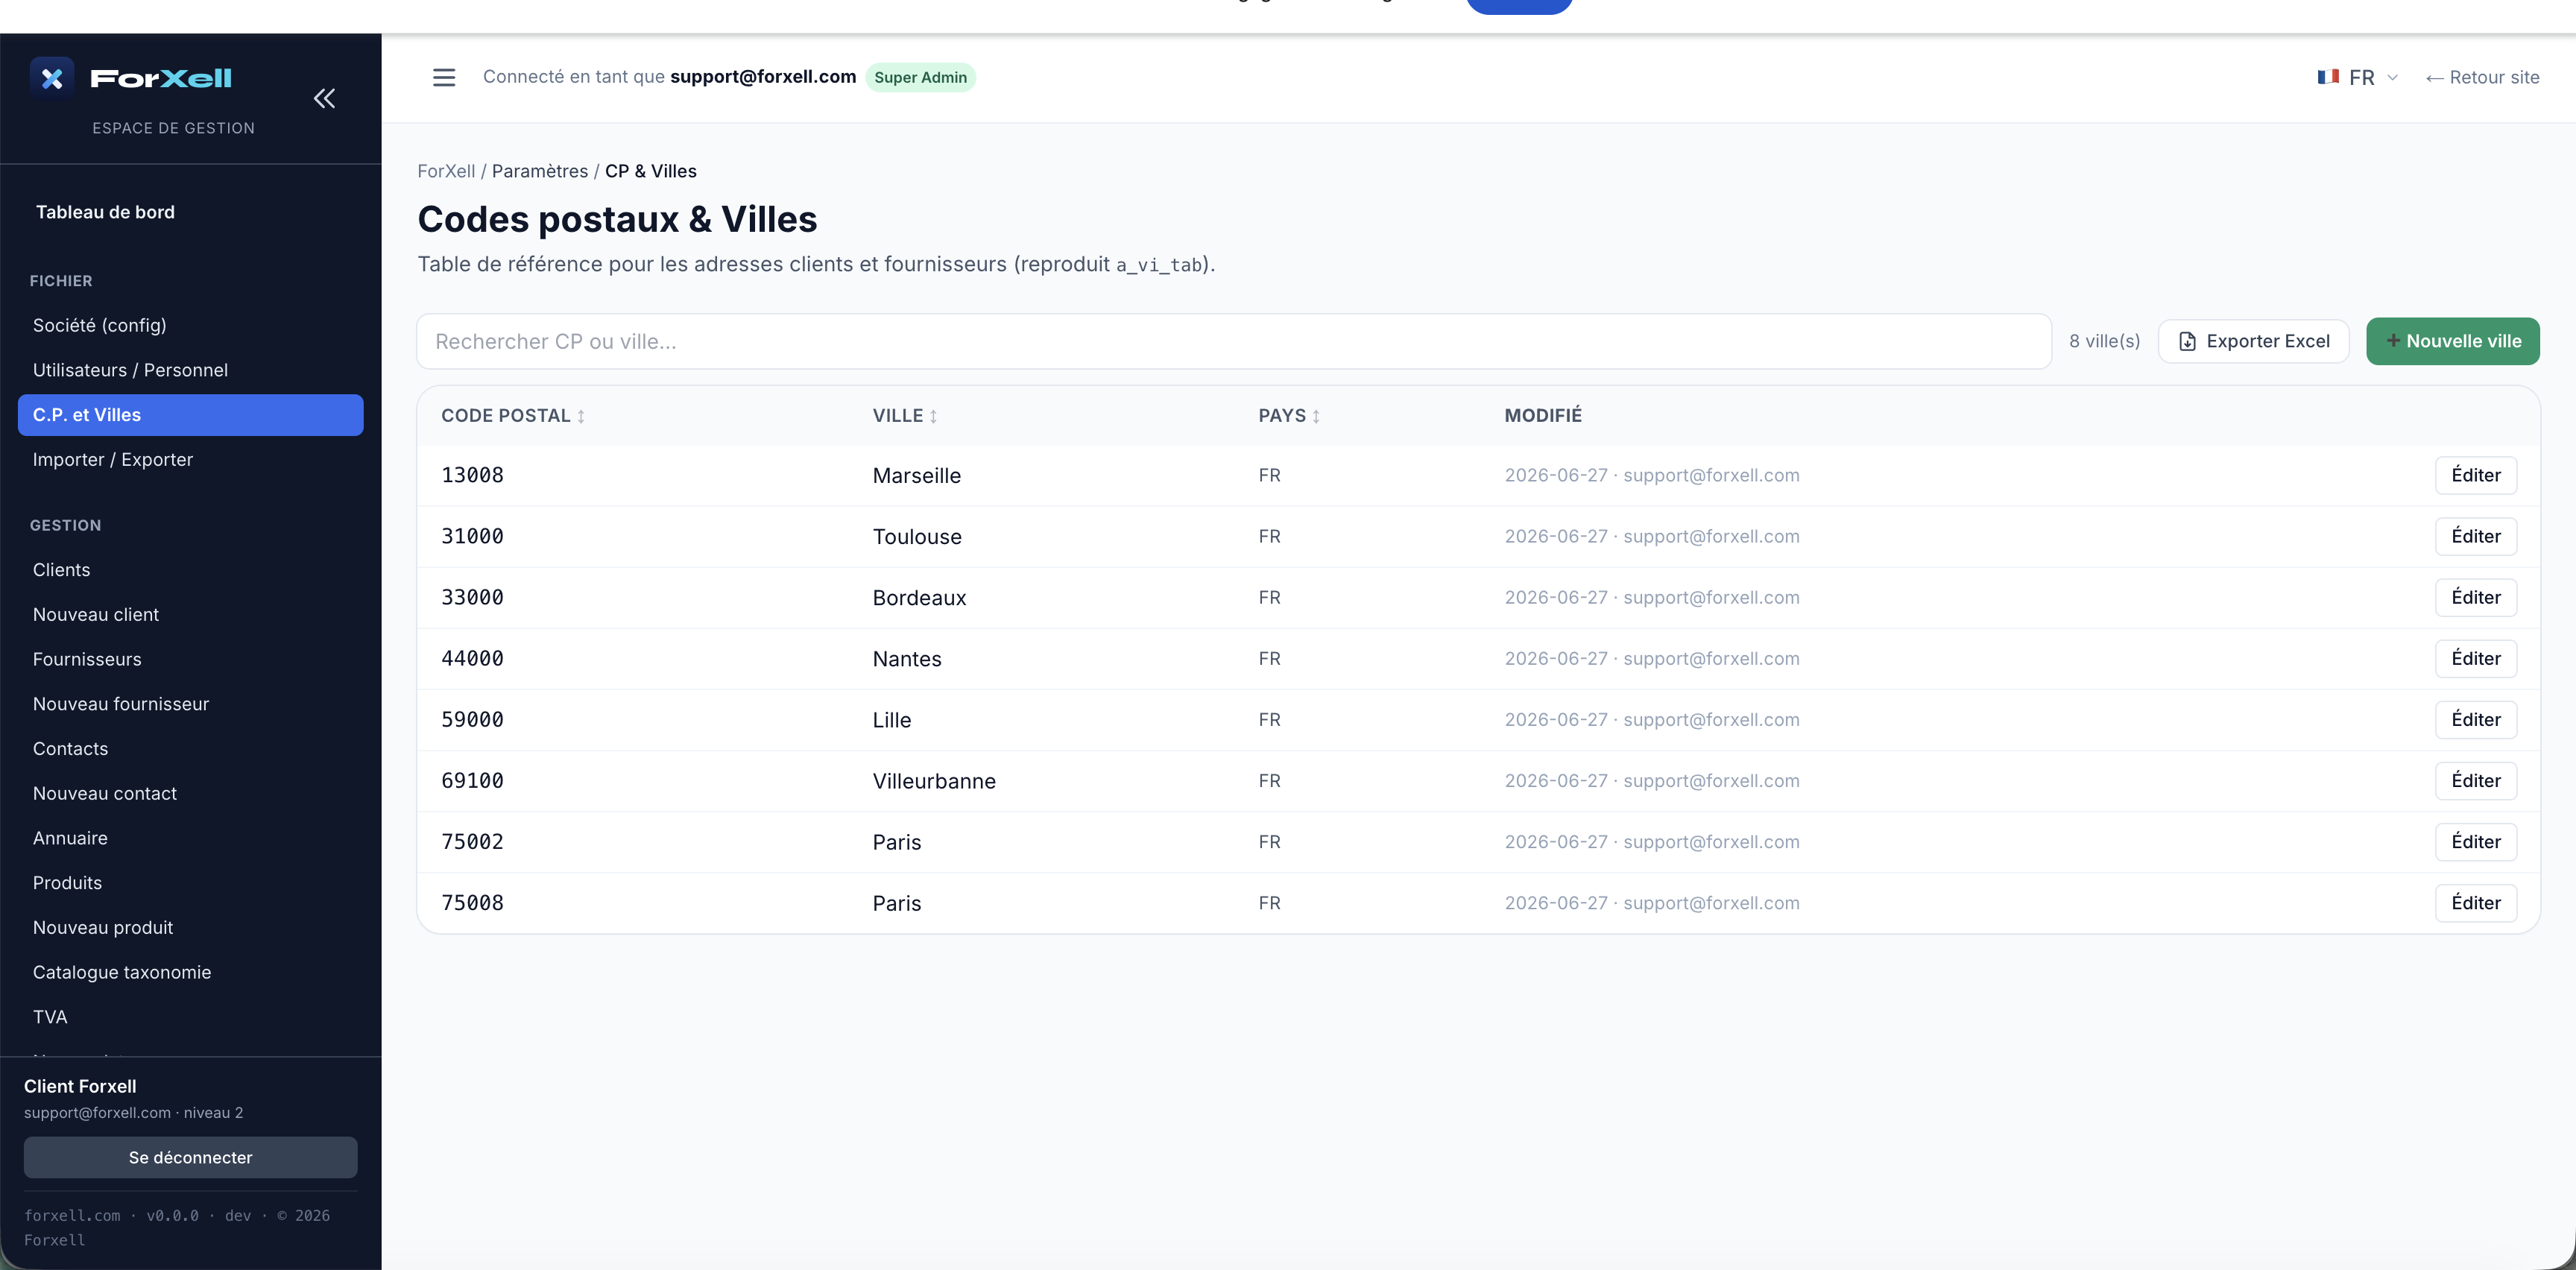
A faster option: if you import your data (Chapter 9), your customers’ and suppliers’ municipalities can be prepared in advance. For manual entry, simply create the cities as you go, before creating the relevant record.
Step 6
Enter Your Suppliers
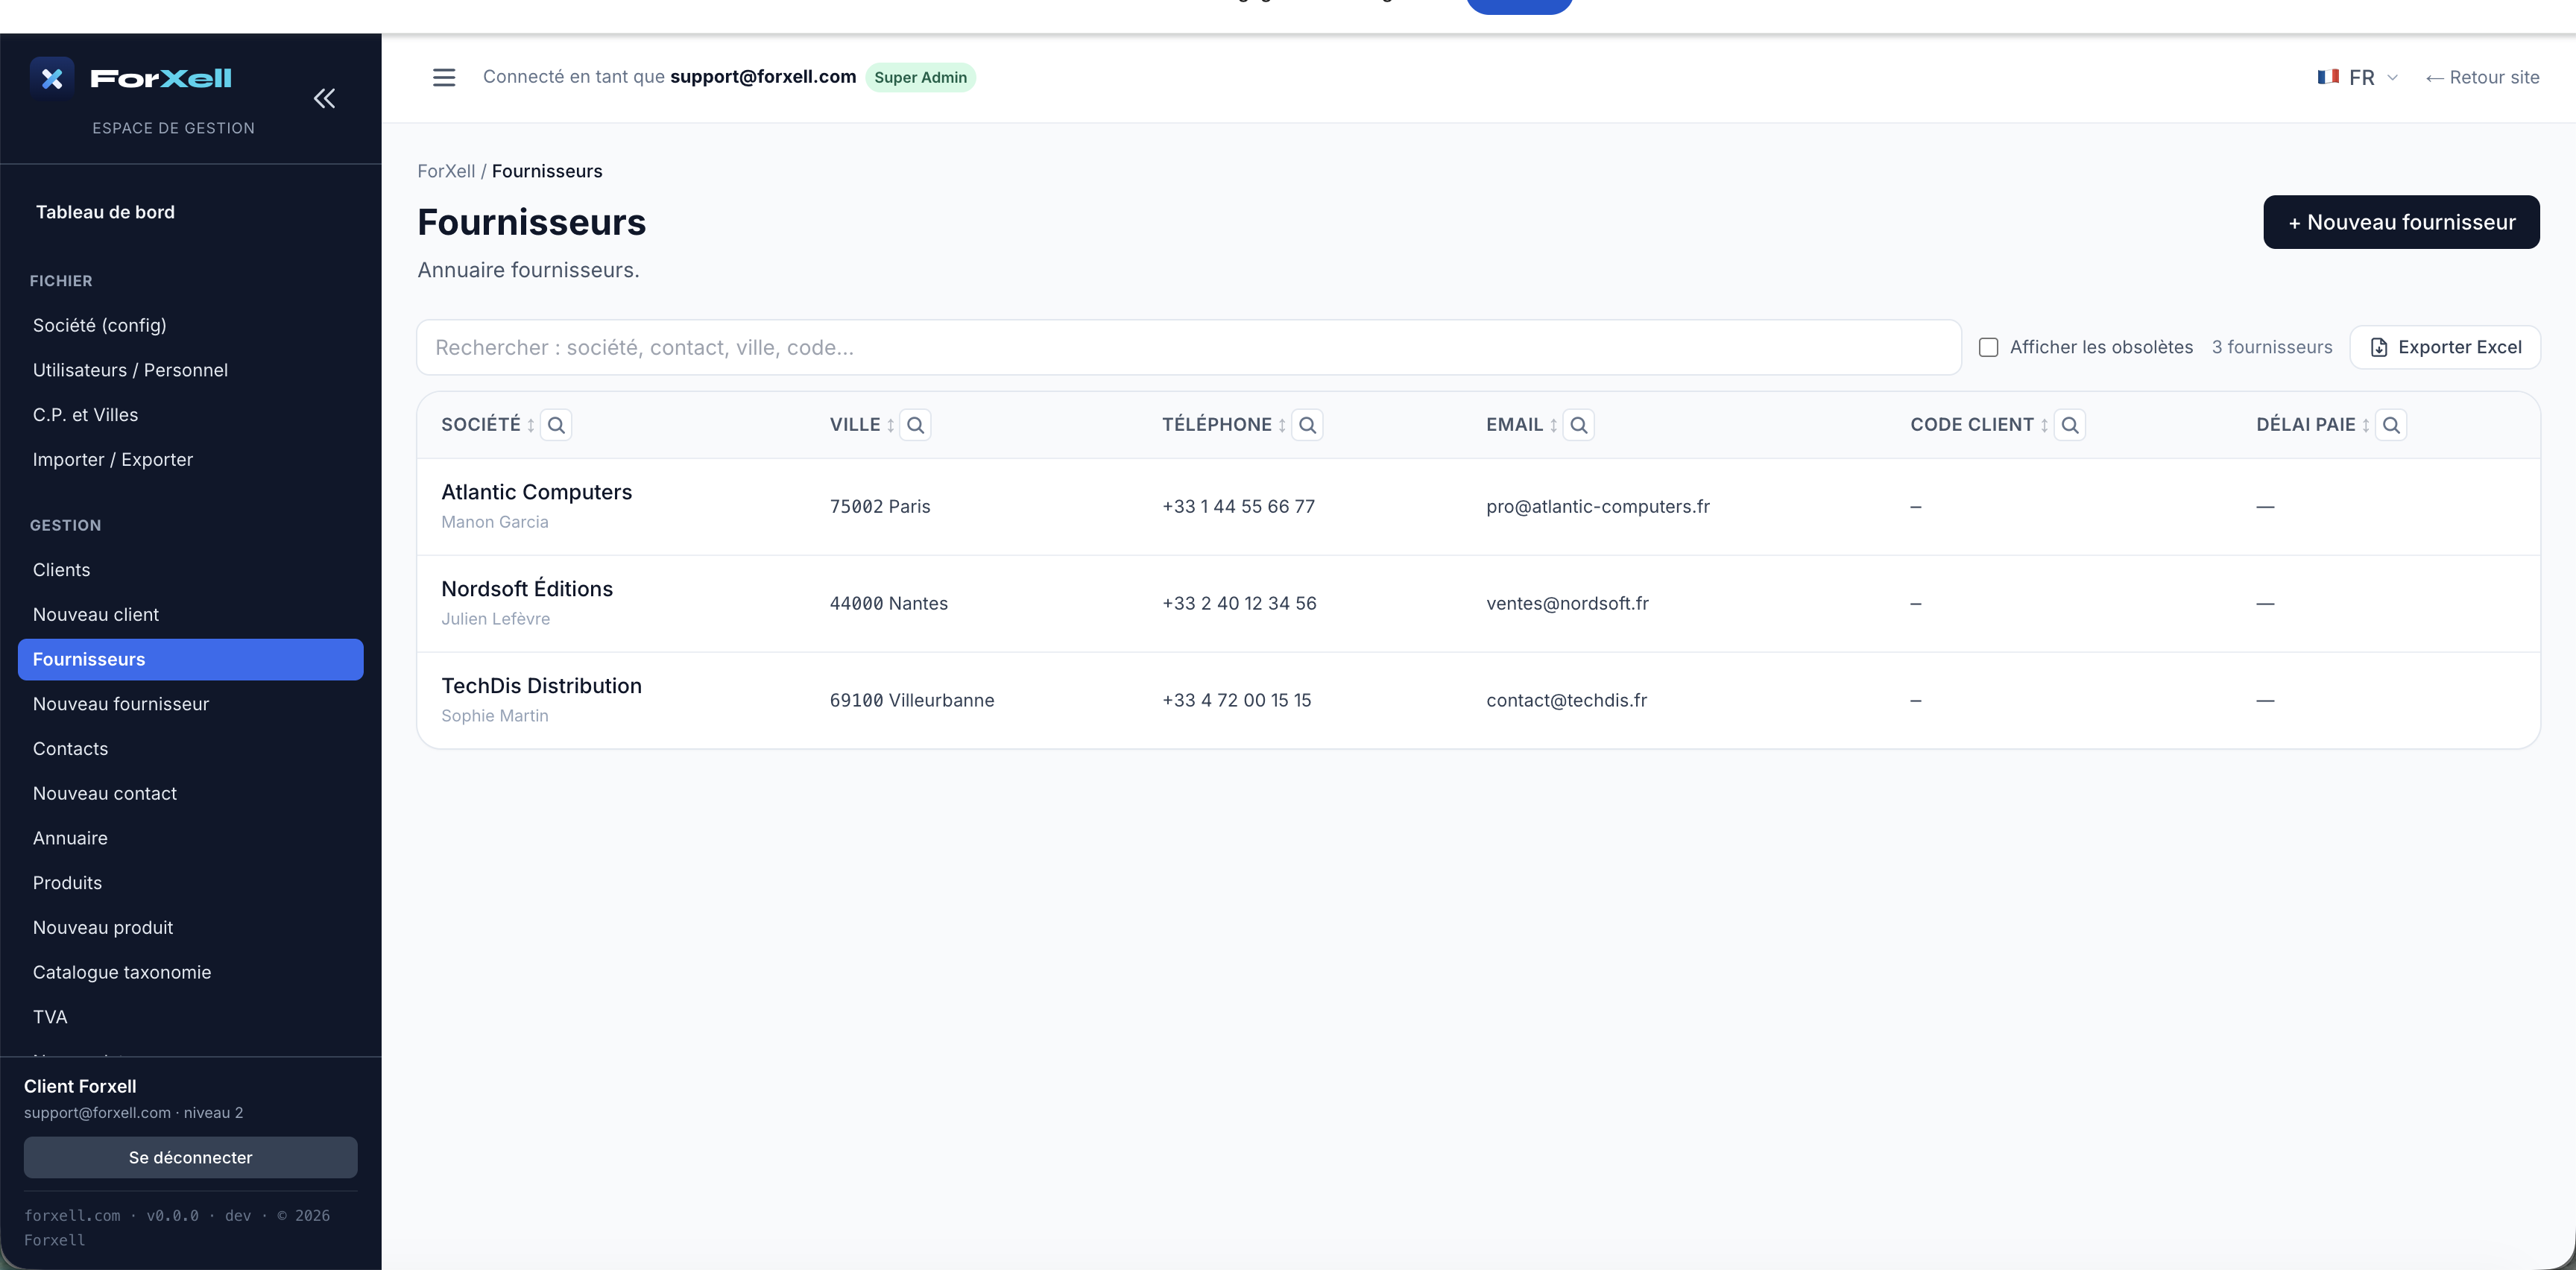
Open MANAGEMENT › New Supplier. Only the Company Name field is required; fill in the contact information, address (ZIP code/City from the database), phone number, email, and intra-Community VAT number. Click Create Supplier.
You can then find them via MANAGEMENT › Suppliers.
Step 7
Enter Your Customers
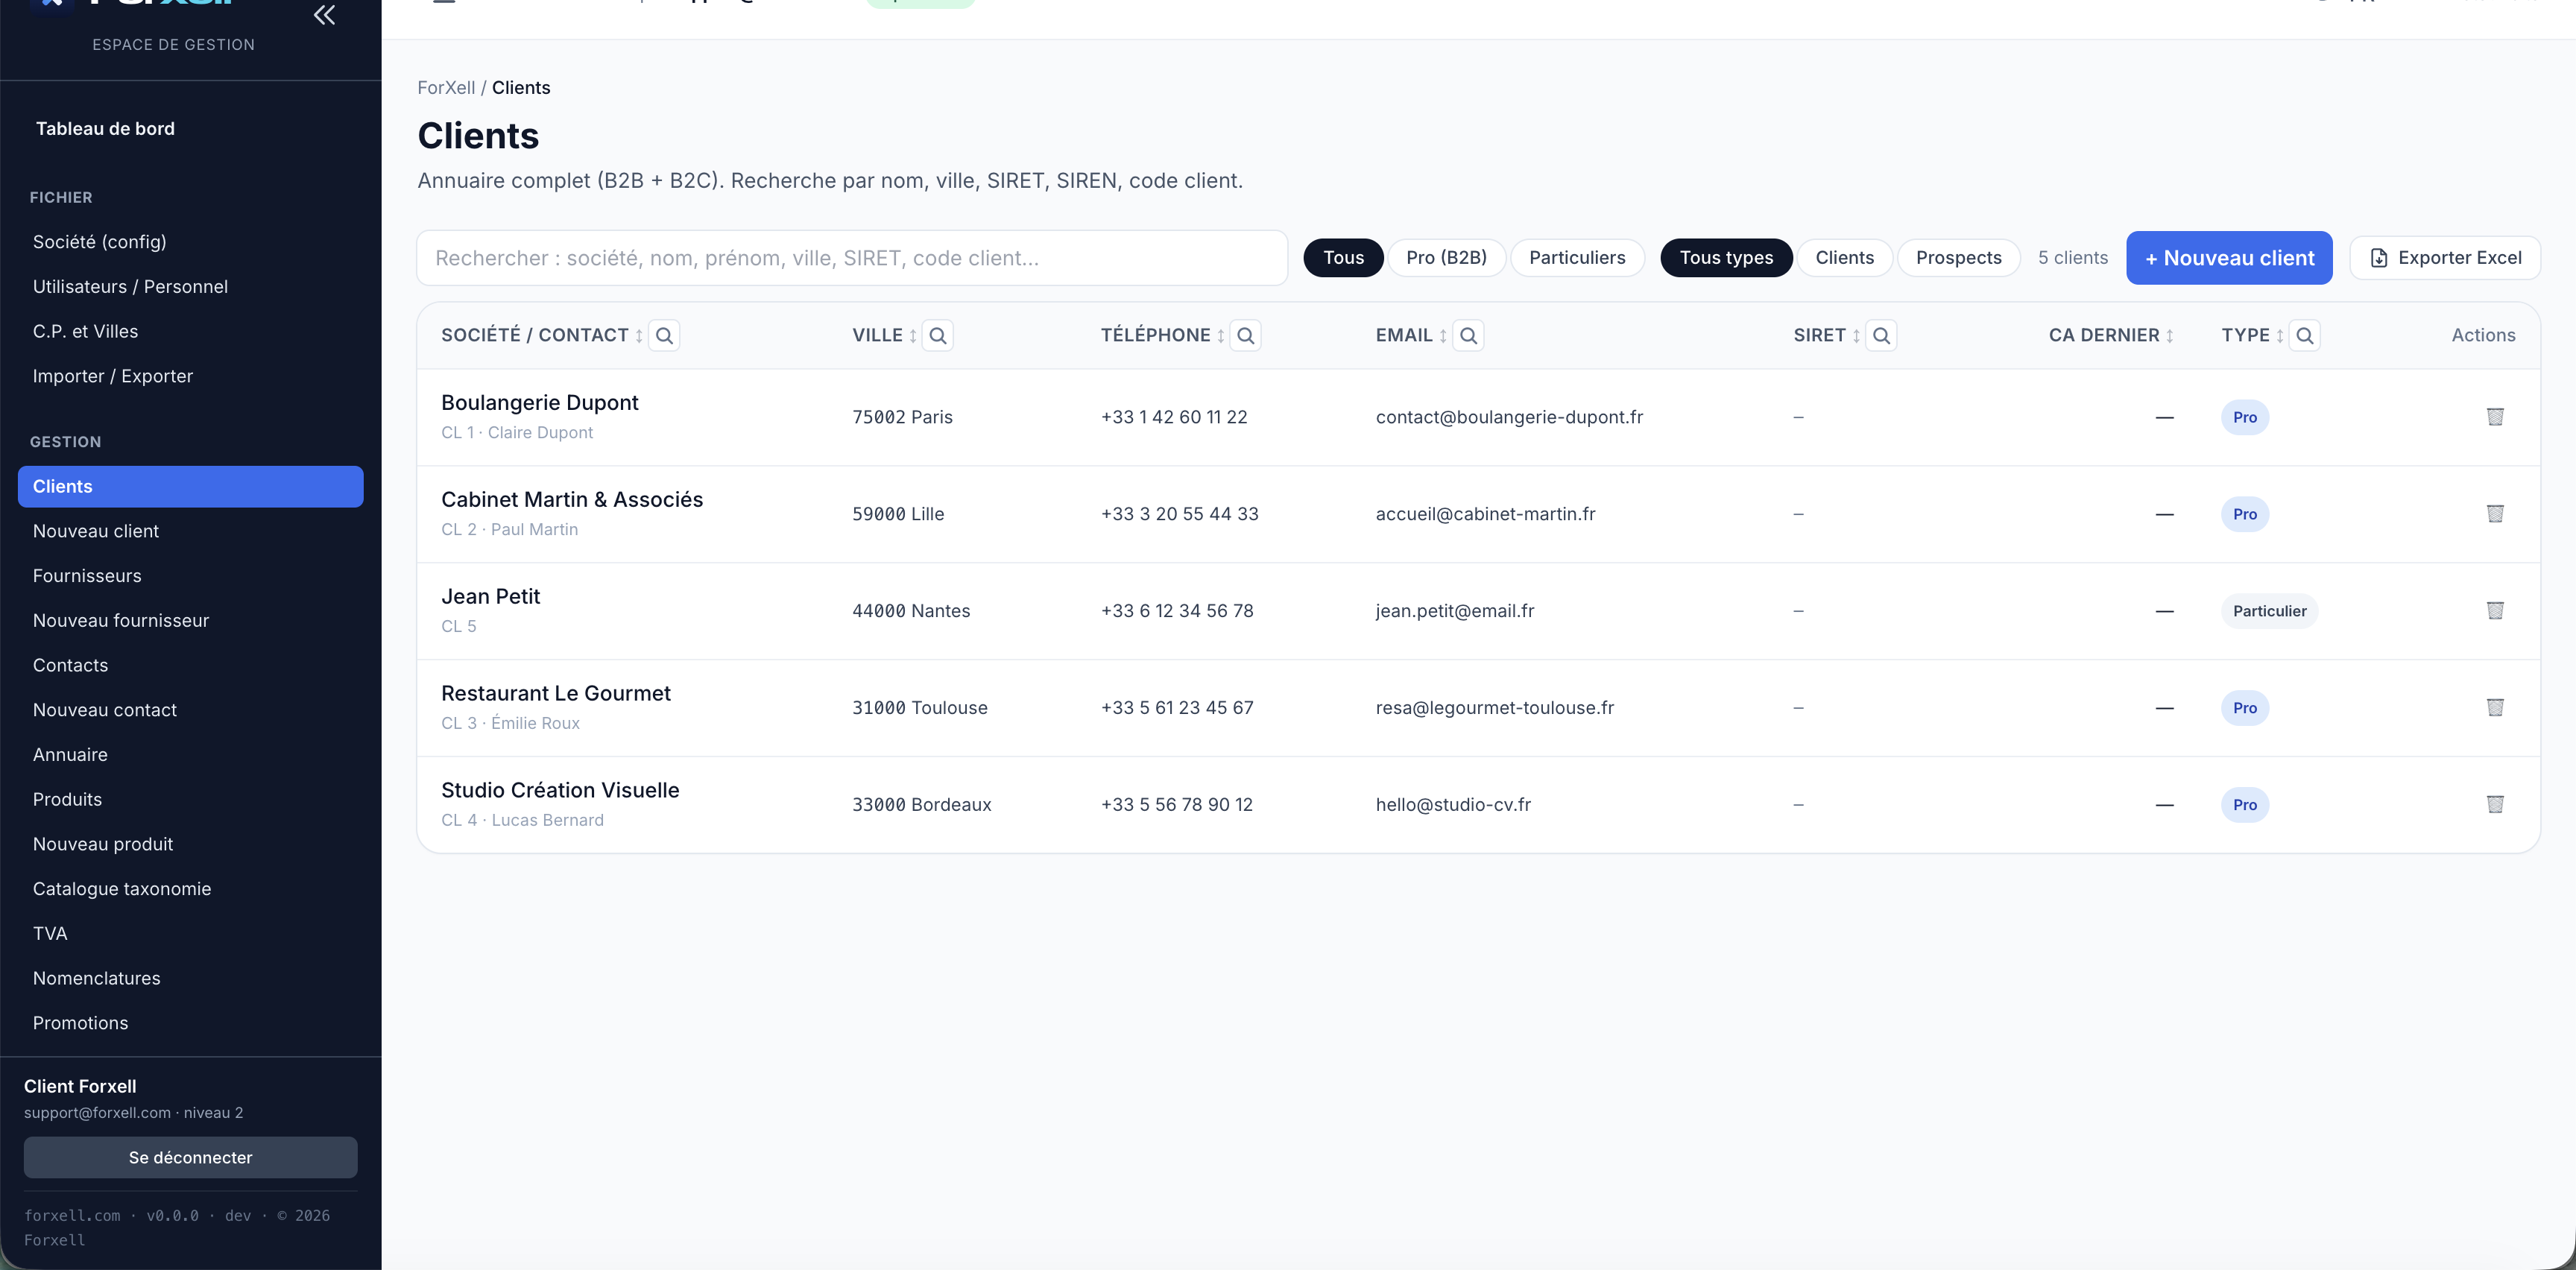
Open MANAGEMENT › New Customer. ForXell distinguishes between two types:
- Business (B2B) — identified by company name.
- Individual (B2C) — identified by first and last name.
Enter the address (ZIP code/City from the database), phone number, and email address, then save. The list is accessible via MANAGEMENT › Customers, with search options by name, city, SIRET number, customer code, and Business/Individual filters.
Step 8
Create Your Products & Services
Open MANAGEMENT › New Product. Enter the product code (required), description, purchase price, and selling price (excluding tax), VAT rate, manufacturer/brand, and, if necessary, the associated supplier. You can create both physical products and services.
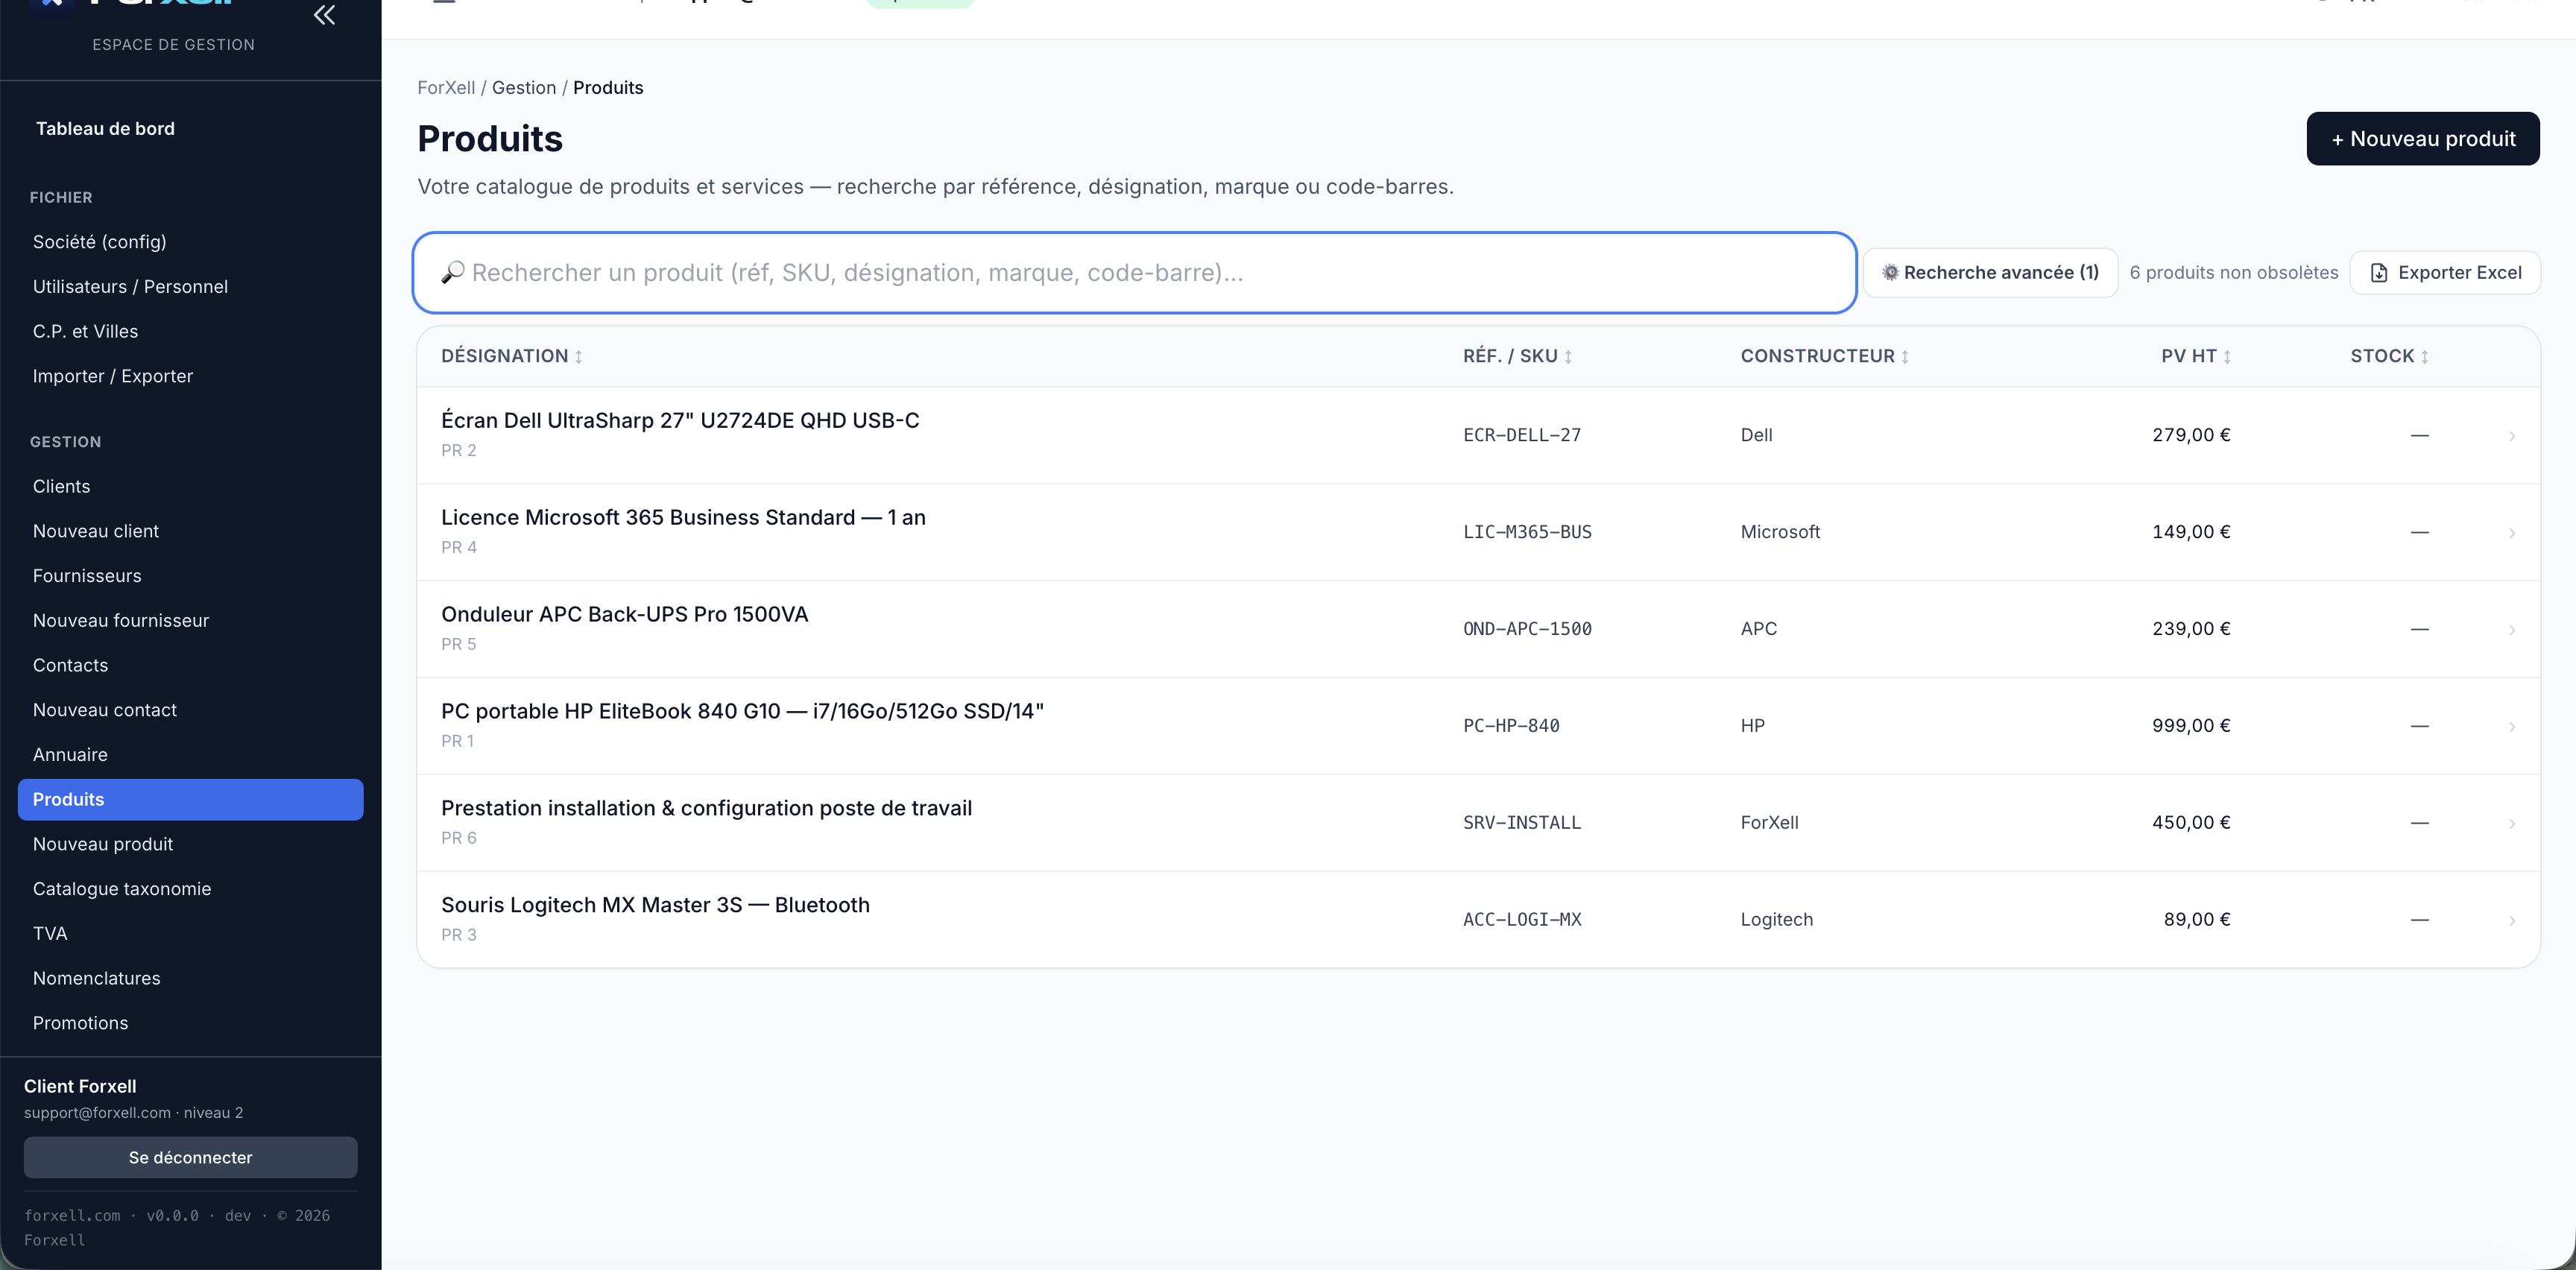
Inventory is managed via the Inventory Operations / Inventory Journal / Inventory Alert tiles. Quantity is not entered on the product sheet; it is calculated based on inventory movements (purchase receipts, outbound shipments on delivery notes). Set an alert threshold for each product to be notified before stock runs out.
Step 9
Importing Your Existing Data (Recommended)
Coming from another software system? No need to re-enter anything manually. The “Import My Data” tile imports your customers, contacts, and products from any CRM.
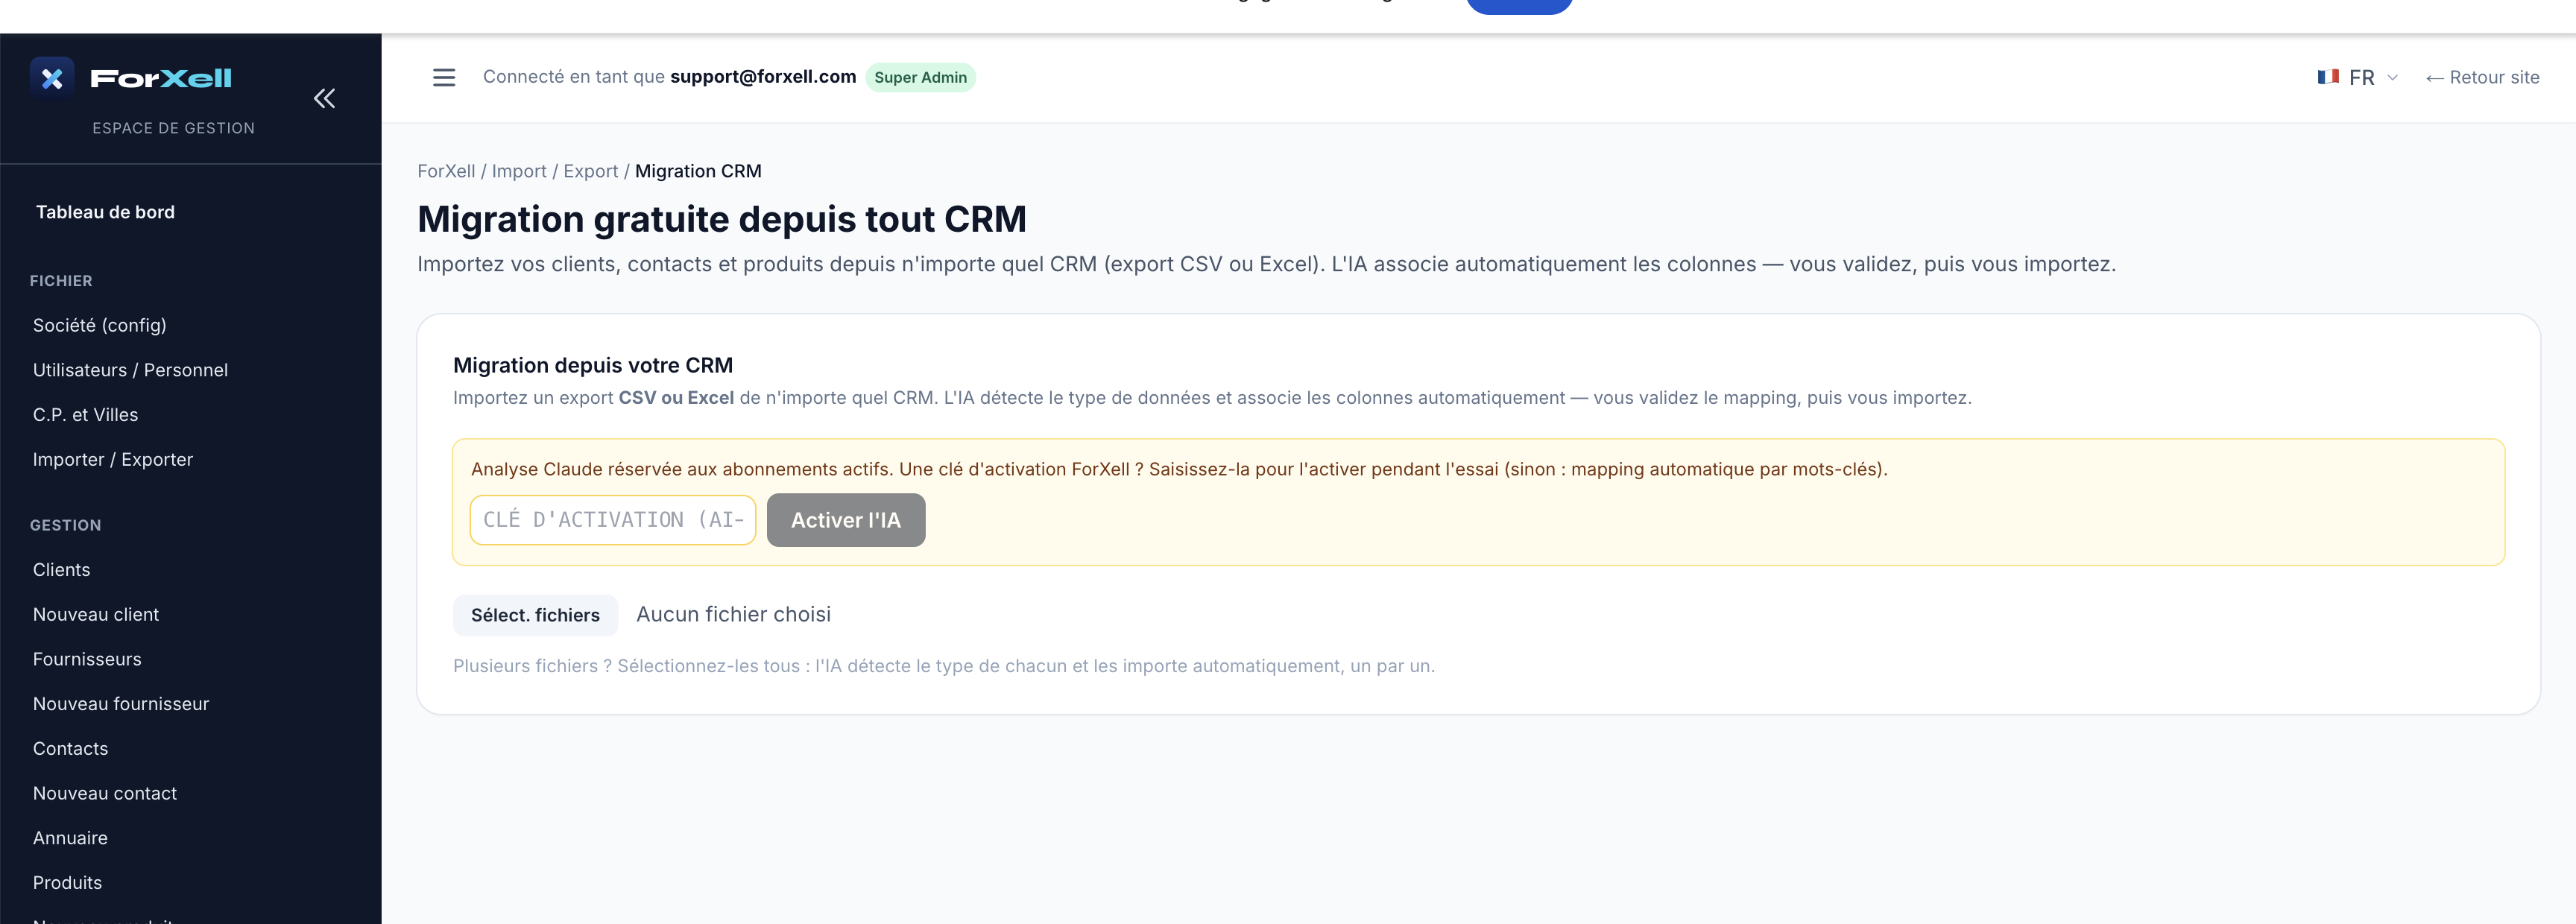
- Export your data from your old tool in CSV or Excel format (one file per type: customers, products, etc.).
- Open the “Import My Data” tile and drag and drop your files (you can select them all at once).
- The AI detects the type of each file and automatically maps the columns. You review the suggested mapping.
- Confirm: the records are created.
Good to know: AI-assisted analysis is available only to active subscribers. During the trial period, you can enter an activation key to enable it; otherwise, automatic mapping based on keywords takes over.
Step 10 — The Core of the Business
The sales cycle: from quote to invoice
ForXell links your sales documents through transformation: each document retains a link to the previous one (the connection dots you see at the top of the records).
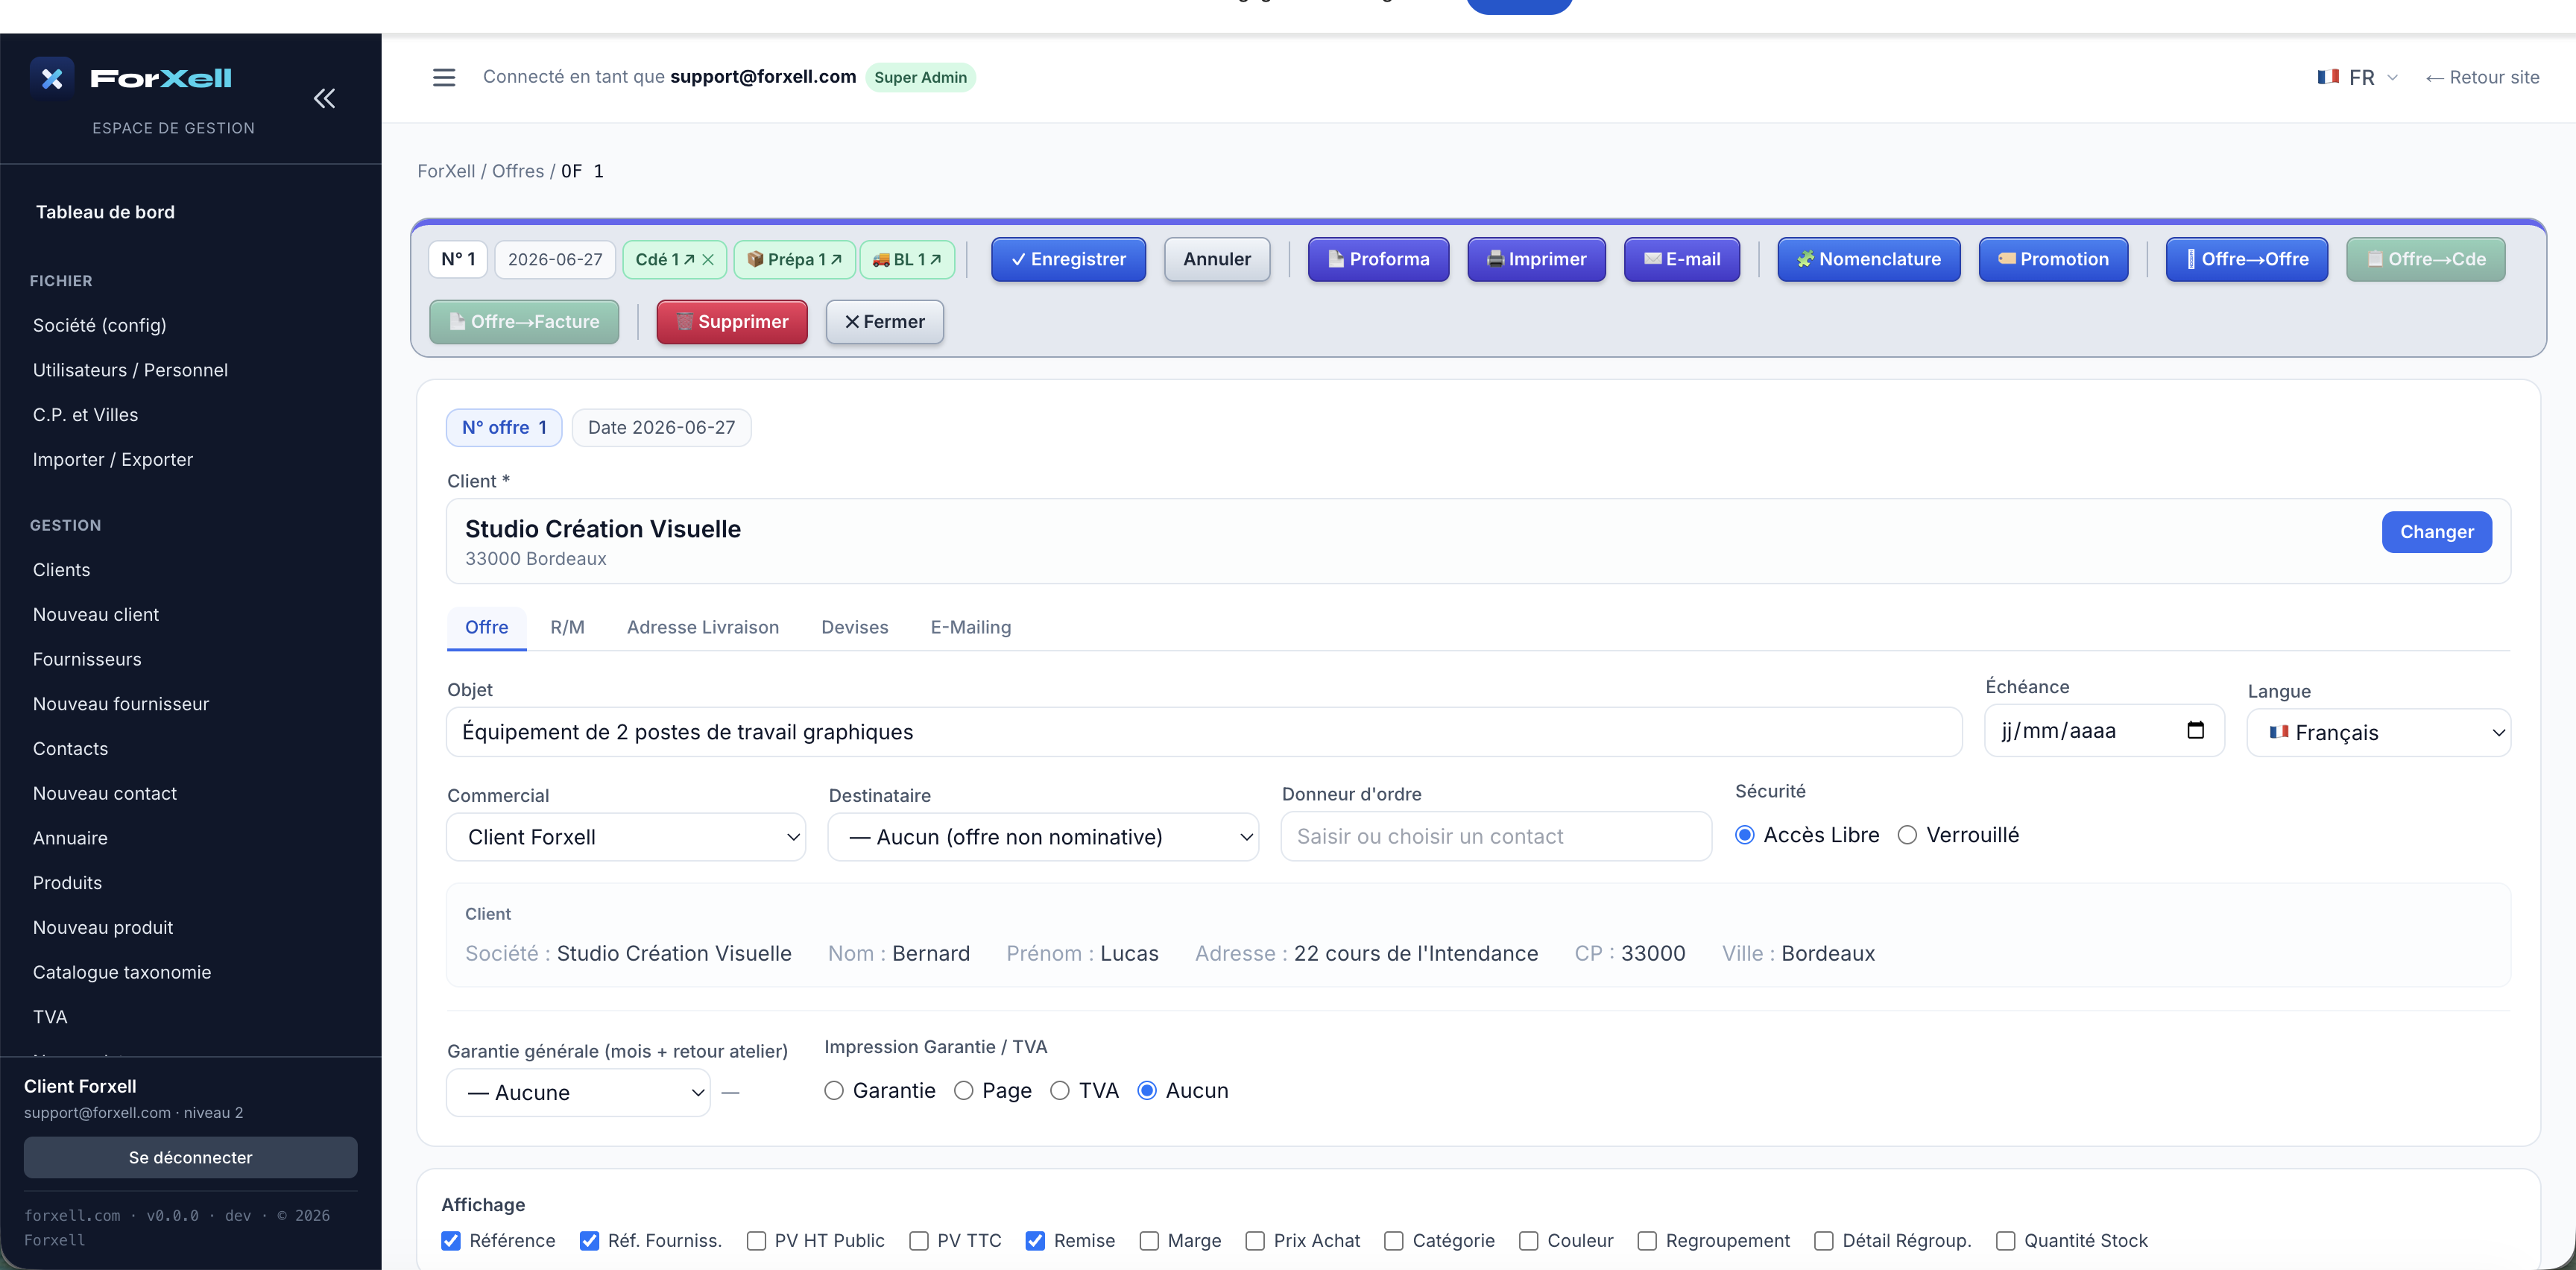
10.1 — Create a Quote (Offer)
Open the “Quotes” tile (or MANAGEMENT › Quotes) and create a quote: select the customer, enter a subject, then add line items by selecting your products (quantity, price, discount, VAT). The total, VAT, and margin are calculated automatically.
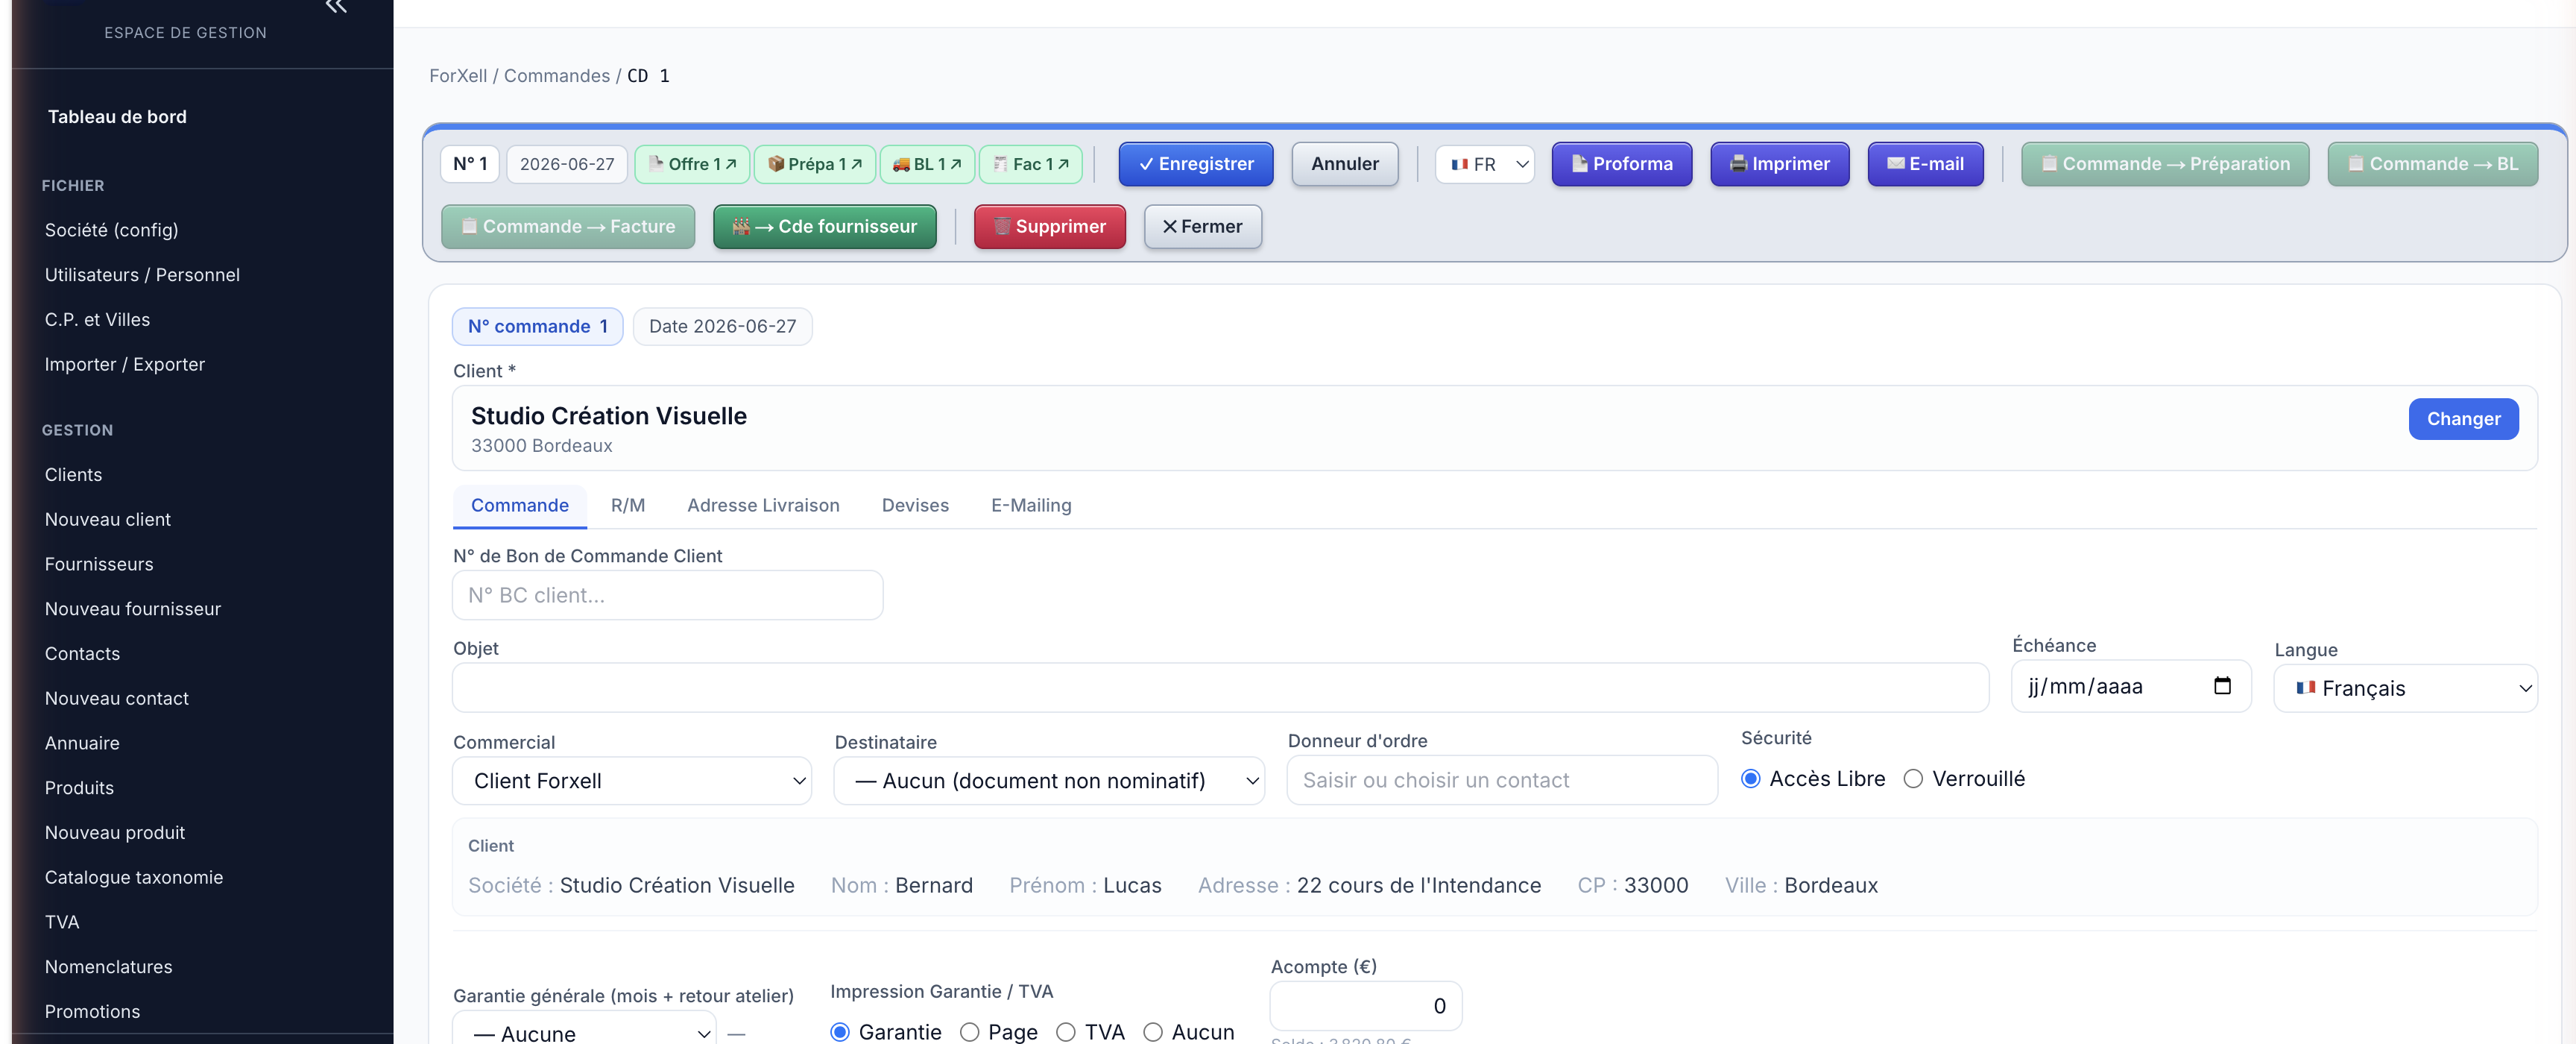
10.2 — Convert to Order
When the customer accepts, click Quote → Order. The order includes all the line items. From the order, you can generate the packing slip, delivery note, and invoice—or even a purchase order to restock.
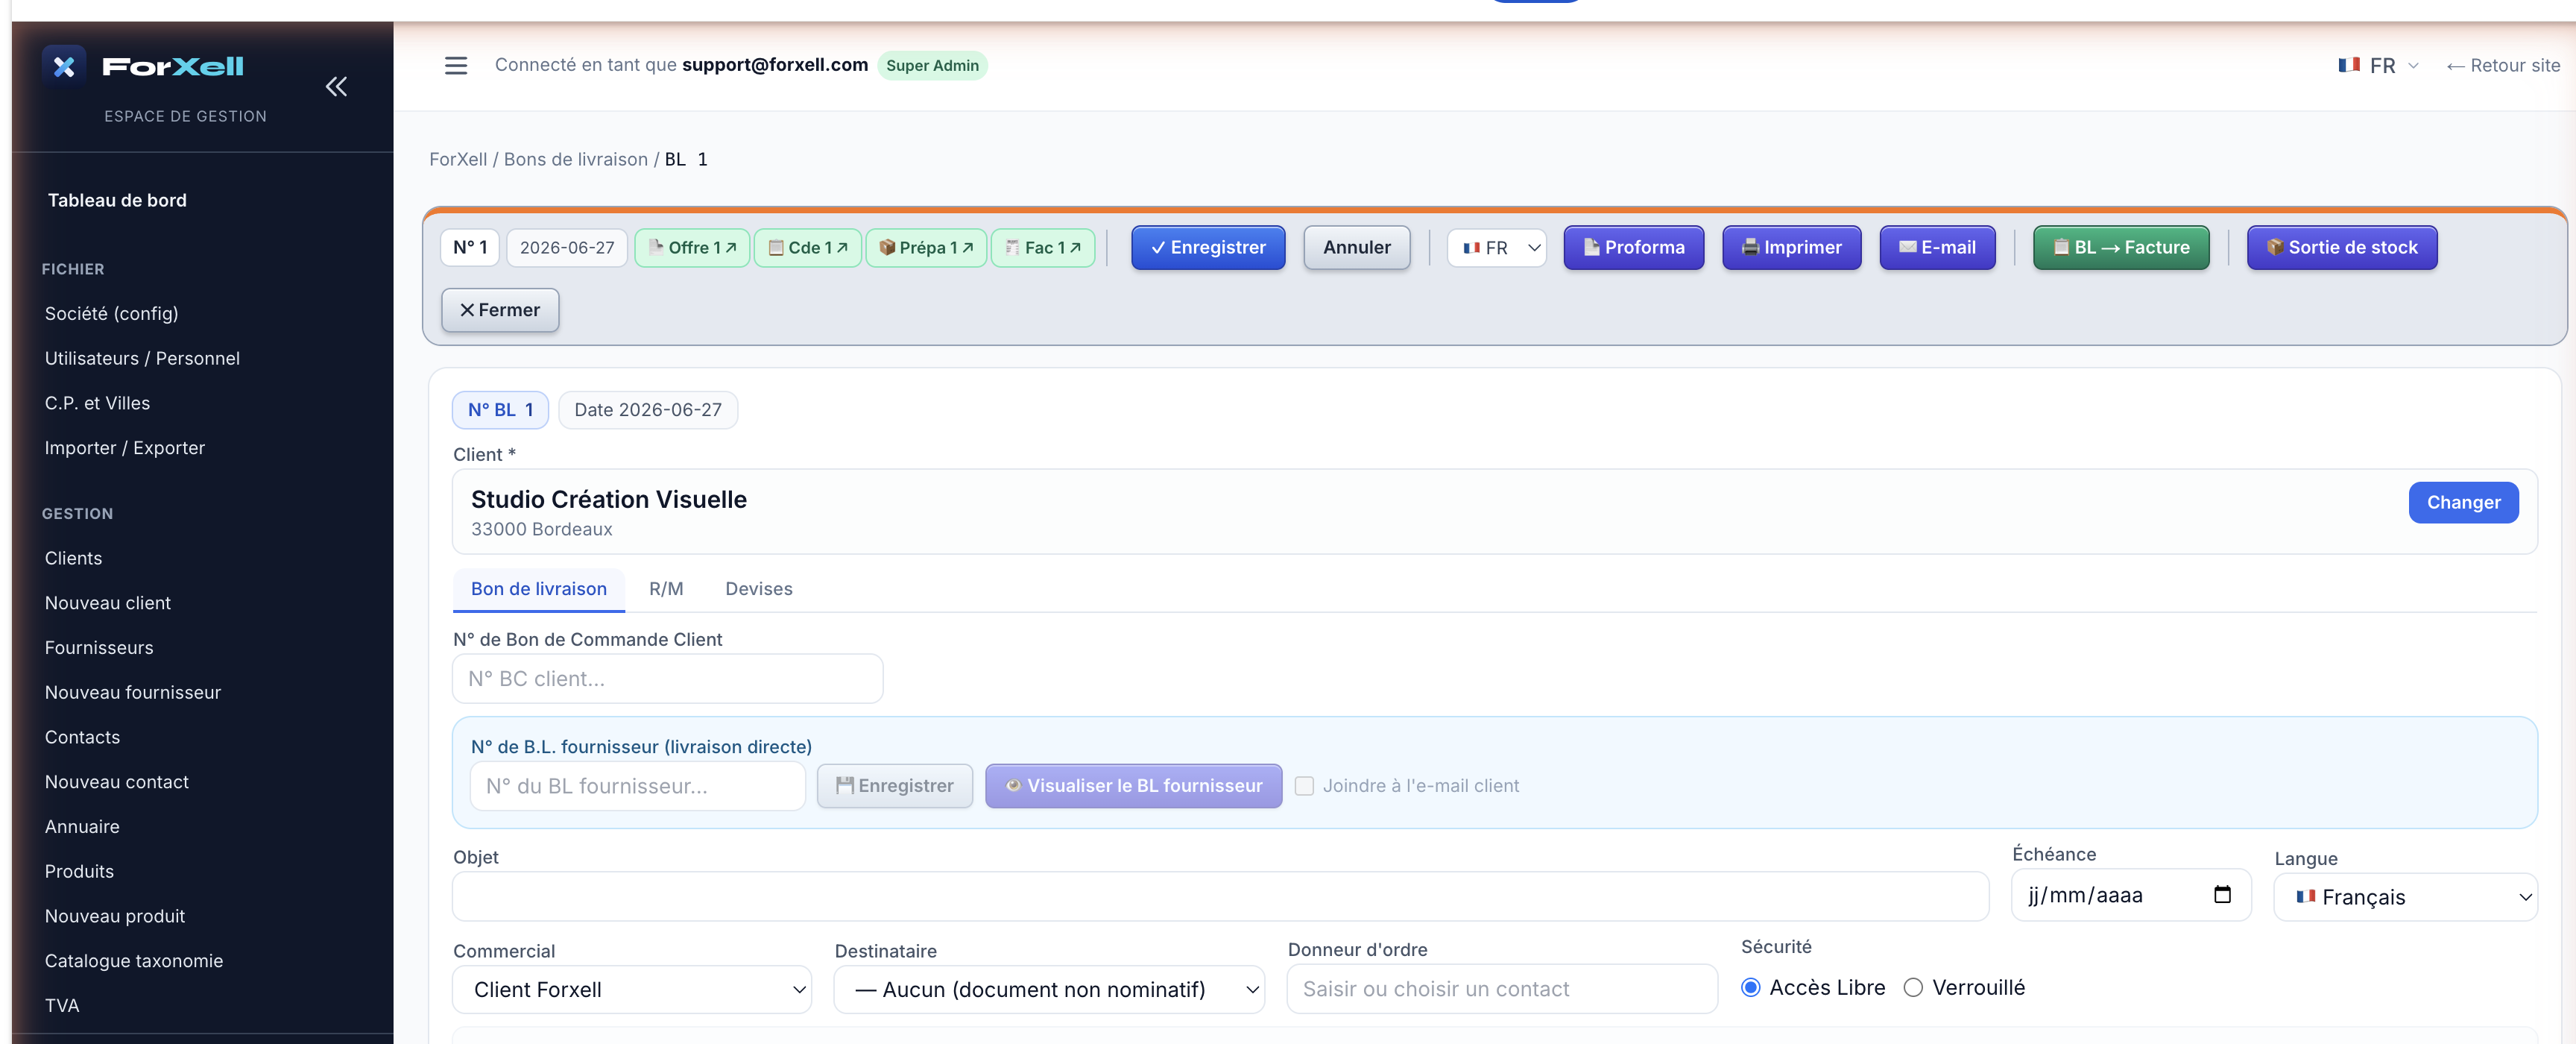
10.3 — Generate the Delivery Note
Click Order → Delivery Note. The delivery note is used to release the goods; the Stock Out button reduces your inventory accordingly.
10.4 — Issue the invoice
From the order (or the DL), click → Invoice. The invoice includes the entire document.
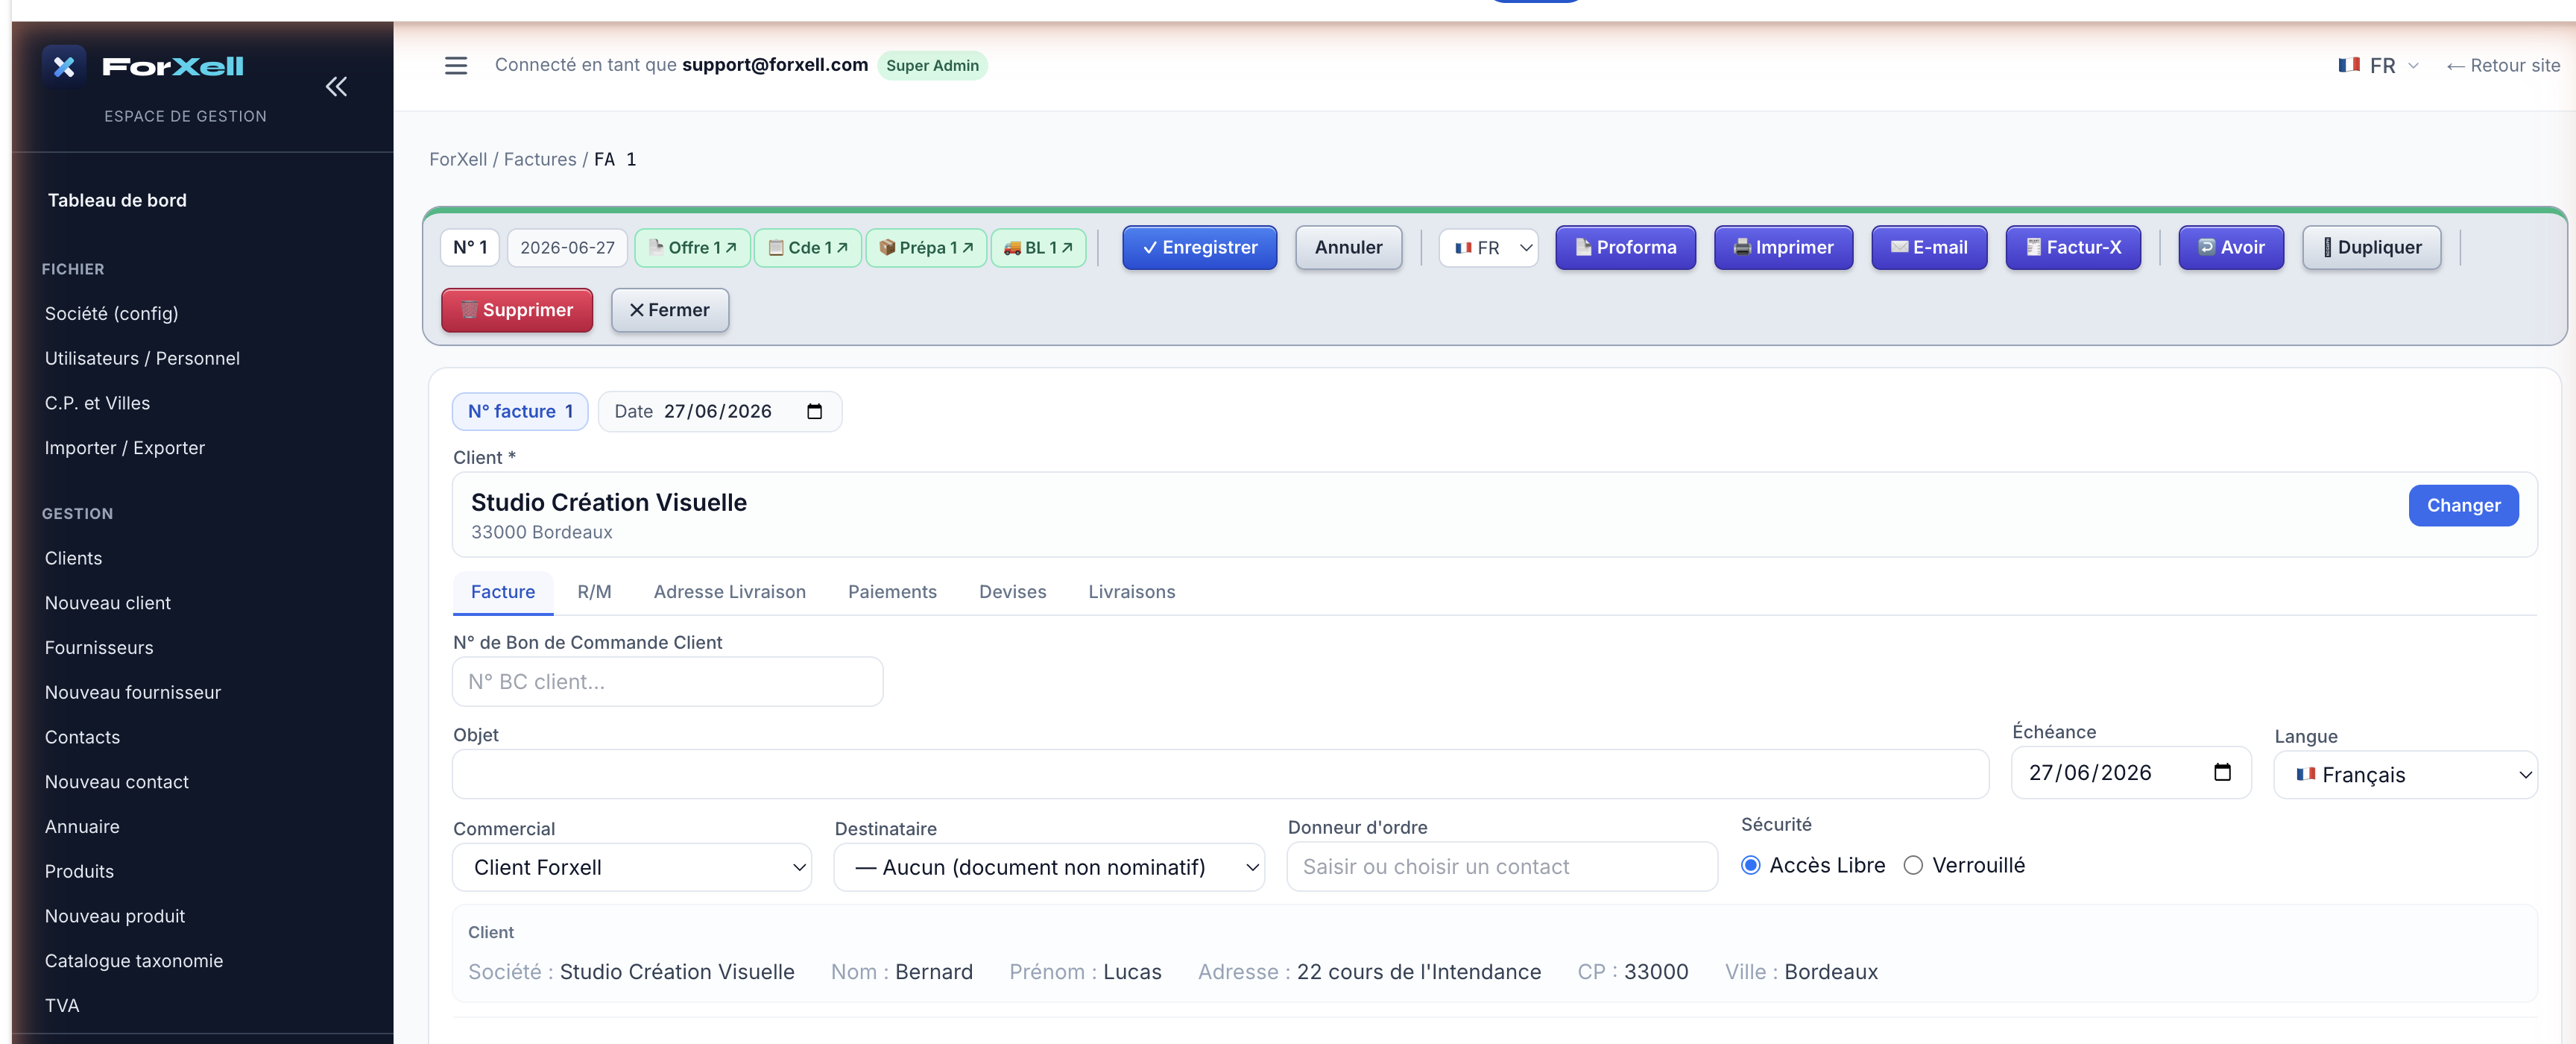
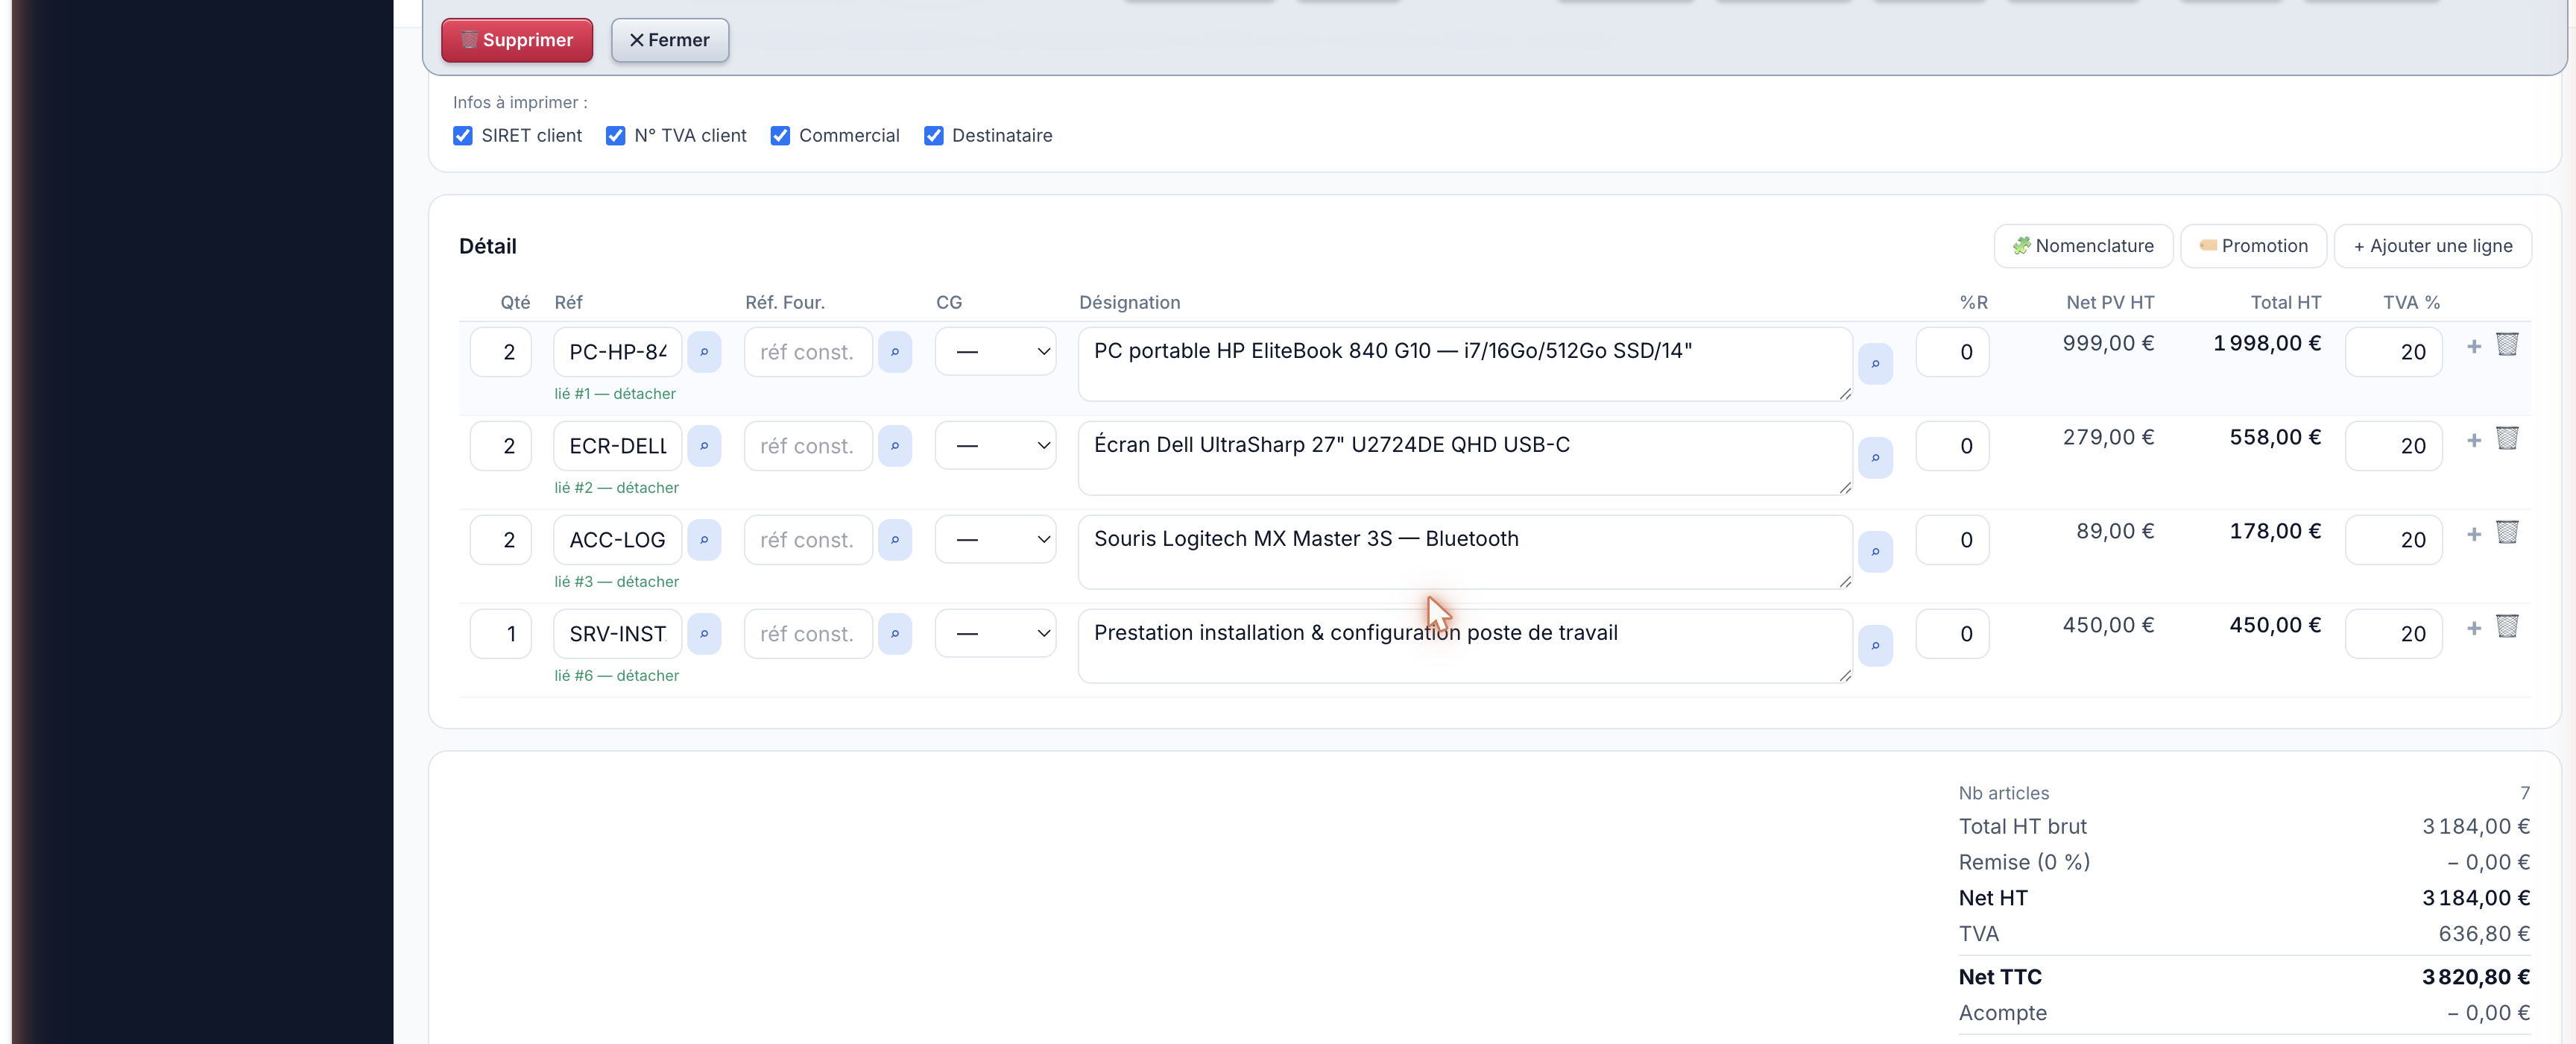

Electronic invoice. The Factur-X button generates a compliant electronic invoice (PDF + structured data), ready for the electronic invoicing reform. The Print and Email buttons allow you to save it as a PDF or send it directly to the customer.
Step 11
Collection & Tracking
On the invoice detail screen, the Payments tab lets you record payments and generate an online payment link. On the management side, the Payments, Unpaid, and Reminders tiles help you track payments and automatically send reminders for overdue invoices.
- Credit Memo — Issue a credit memo with a single click directly from the invoice if necessary.
- Accounting — Journals, General Ledger, Trial Balance, and FEC Export for your accountant.
Step 12
Take It Further — A Complete ERP
Beyond the sales cycle, ForXell covers your entire business. Here are the additional modules, illustrated by the demo company.
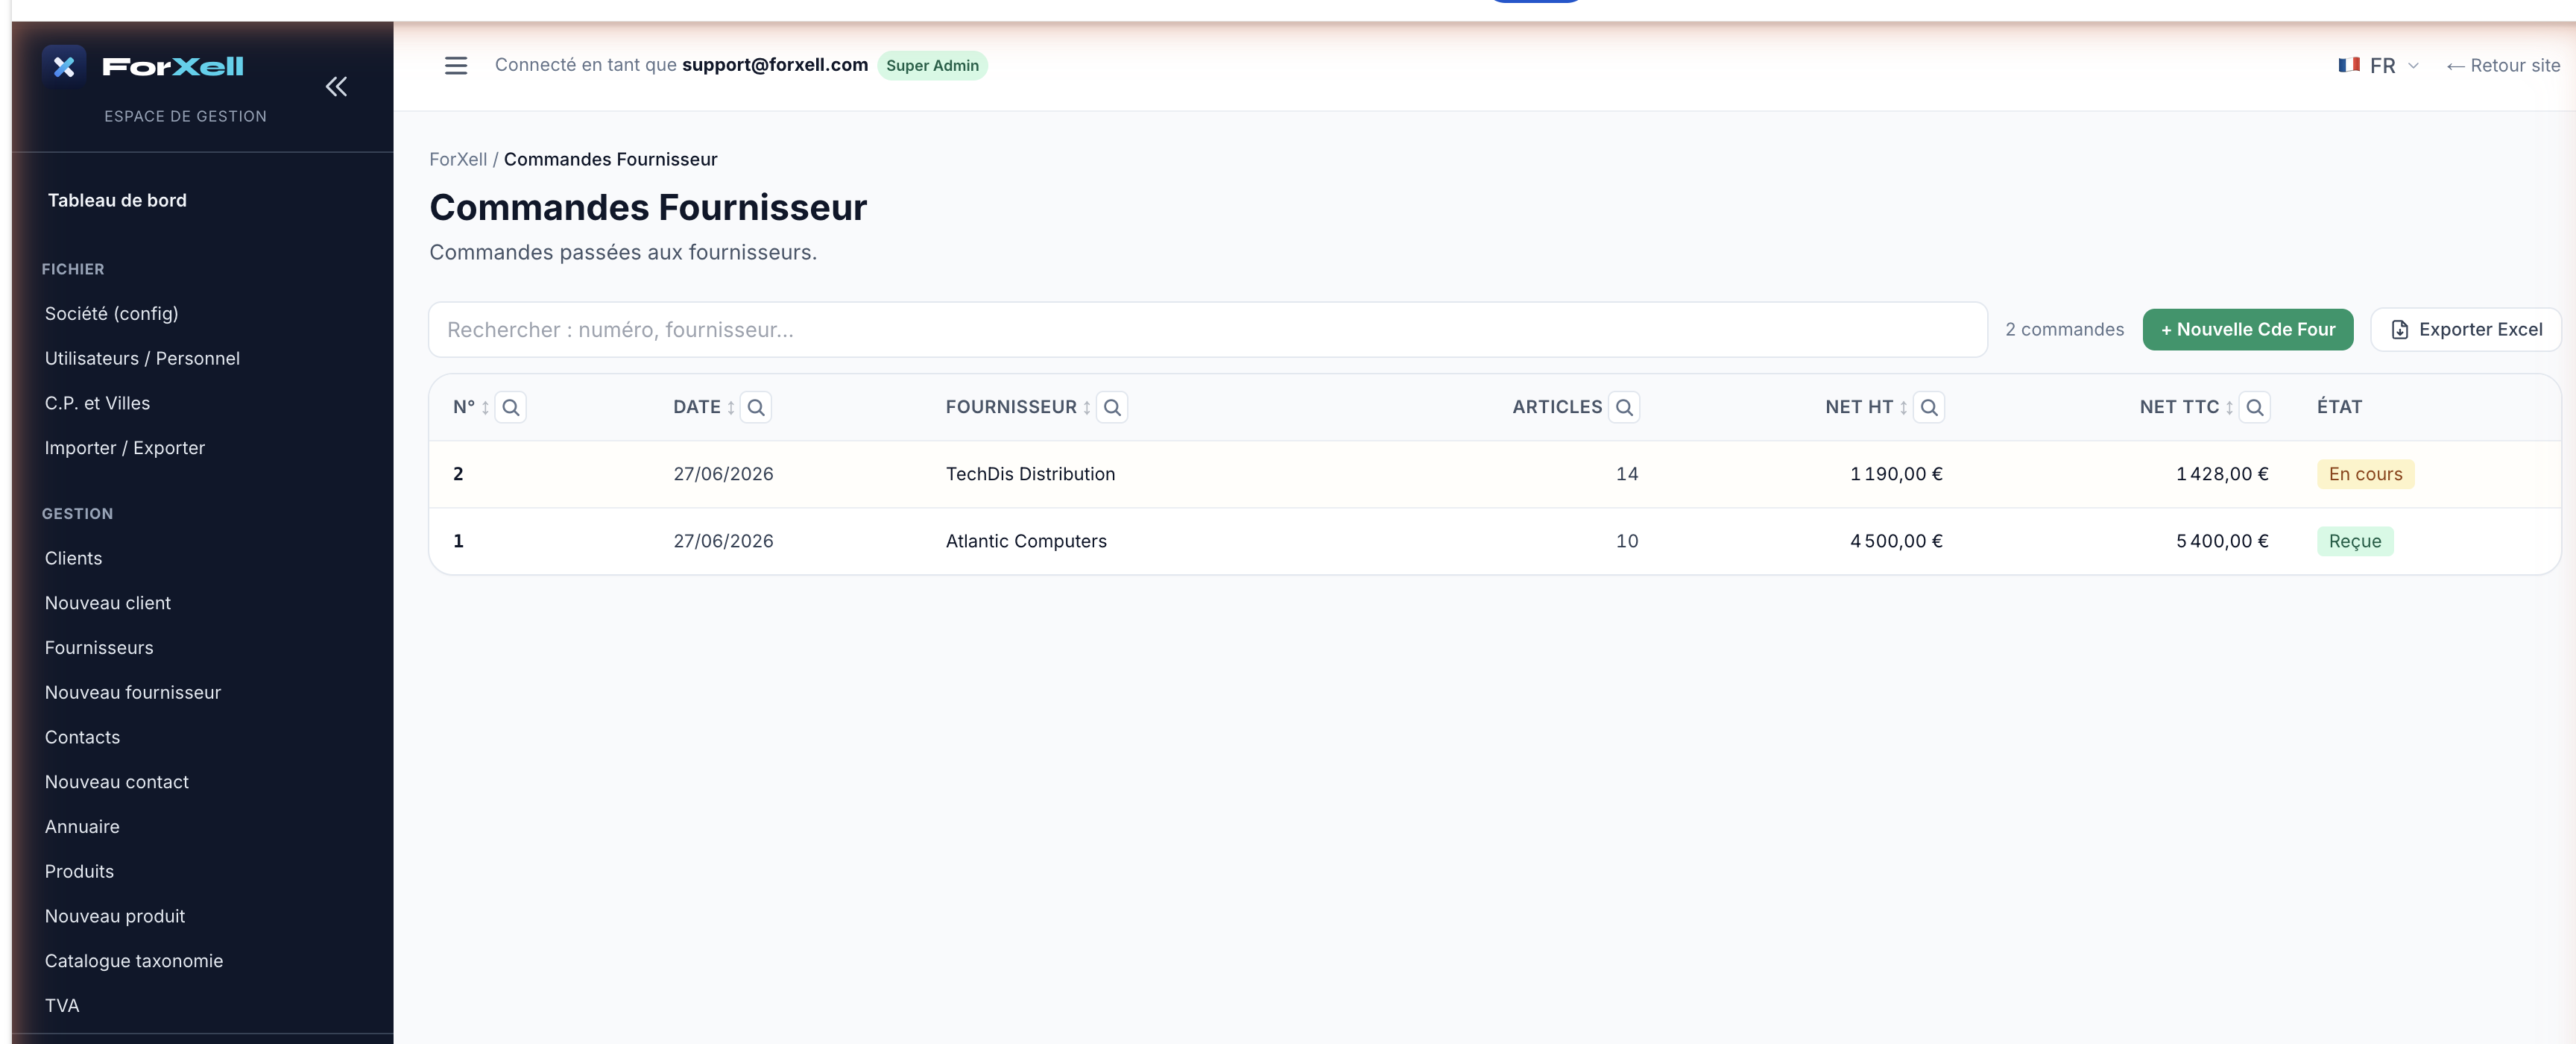
Purchasing & Procurement
Place supplier orders (directly or by converting a customer order), track receipts (full or partial) and backorders, then manage supplier invoices (with OCR). Each receipt updates inventory and the WACC (weighted average cost per unit).
Inventory
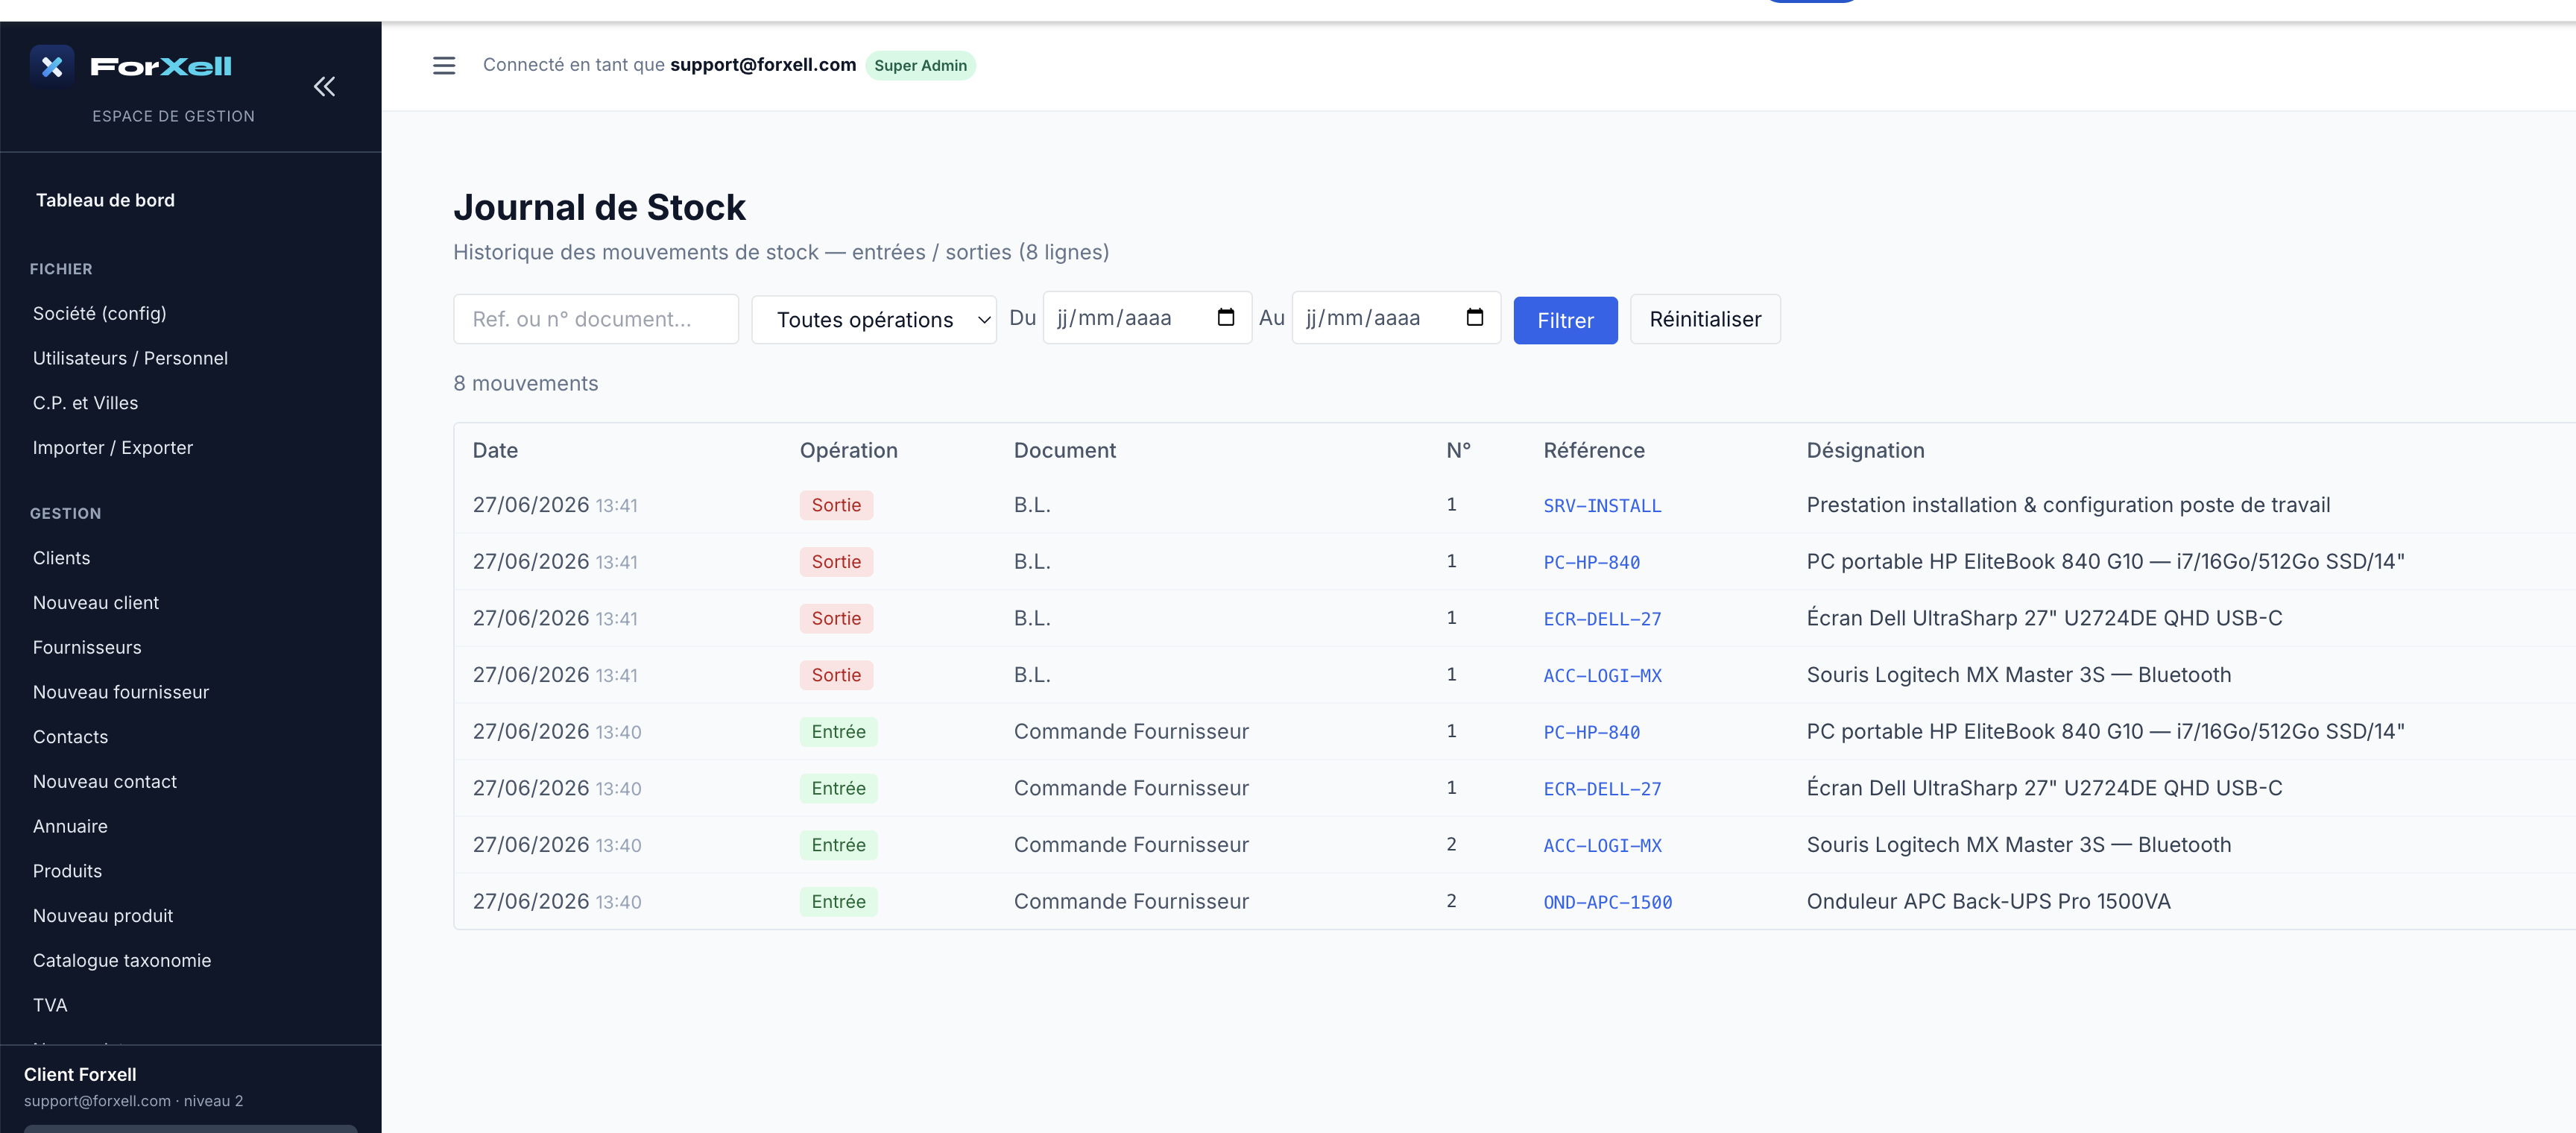
Inventory is tracked via the inventory journal (receipts and delivery notes). The “Inventory Operations,” “Inventory Journal,” and “Inventory Alert” tiles provide visibility; an alert threshold for each product warns you before stock runs out.
Accounting
Import your national chart of accounts (French PCG, German SKR, etc.), then post your sales and purchases as journal entries. You then have access to Journals, General Ledger, Trial Balance, Aging Balance, Income Statement / Balance Sheet / VAT reports, account reconciliation, bank reconciliation, and FEC export (and DATEV for Germany).
Customer Relations & After-Sales Service
Helpdesk (tickets with SLAs), customer and supplier after-sales service, warranties, serial numbers, contracts, and contacts linked to companies.
Organization
Shared calendar (synchronizable with Outlook/Microsoft 365), projects in a Kanban board, tasks, and expense reports.
Collections & Cash Flow
Payments, Overdue Accounts, Automatic Reminders, Credit Memos, Bank Reconciliation, and Payment Schedule.
Management & AI
AI Assistant (Basic & Pro), Revenue/Product Stats, Top 50, Commissions, and Advanced Dashboard (2D/3D charts).
Need help? A context-sensitive help button is available in every window, and a comprehensive help center is accessible from the Help tile.